Thursday, December 8, 2011

Spinach Artichoke Chicken Pot Pie

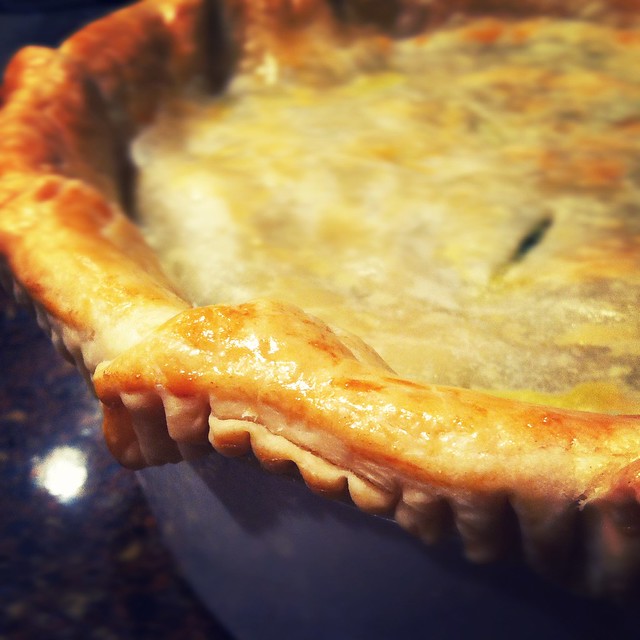
On chilly early winter days, nothing seems to hit the spot more than a comforting dinner. I throughly enjoy coming home from work and, if time permits, preparing a good meal! One of my absolute favorite cold day dishes includes chicken pot pie. Mmm...savory filling with buttery pie crust? Yes, please. Last year, however, I found a way to make the traditional chicken pot pie a little more spunky. I combined flavors of crowd-pleasing spinach artichoke dip with the classic dinner and-- ta-da! Welcome my Spinach Artichoke Chicken Pot Pie.


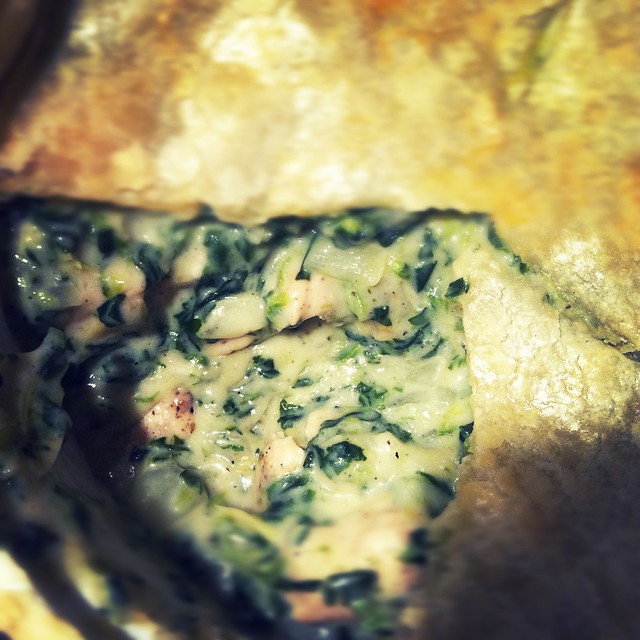
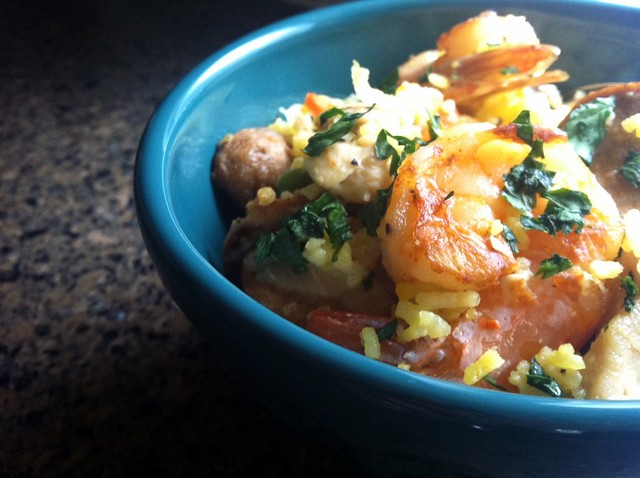
You can thank my friend, Instagram, for all my "managed to get some photos in with bad lighting" images. Cheers!

This here, like the dip, is a people and belly friendly meal. I've made it several times for my fiancĂ©, best friend, and colleagues. Also, like a good friend, this pot pie easily supports your needs; if you're out of pie dough, make this recipe into a pasta with our favorite noodles. Simply add 1/2-1 cup of extra milk (to your desired thickness) and about 1 extra cup of Parmesan cheese.


Spinach Artichoke Chicken Pot Pie
serves 4-6

1 1/2 tbsp olive oil
2 ½-3 skinless, boneless chicken breasts (cut into chunks)
4 garlic cloves, minced
½ large red onion, diced
1 can of artichoke hearts--unseasoned, drained, and chopped
1 10 oz package of frozen spinach-- thawed and drained well
1/2 tsp ground nutmeg
3 tbsp unsalted butter
4 tbsp all purpose flour
3/4 cup milk (I used fat-free)
salt and pepper
¾ cup fresh Parmesan
½ cup grated Gouda cheese
1 egg
1 prepared and rolled out  (to fit the size of your dish) round of pie dough using the recipe below(If you are lazy and purchase yours from the grocery store, I won't tell ;) )
a deep pie or round baking dish (9")

1. Season the chunks of chicken breast with salt and pepper (about 3/4-1 tsp of salt and 1/2 tsp of pepper). Once a medium heavy bottom sauce pan with the olive oil is heated on medium heat, add the chicken and cook for about 5 minutes just until sides are lightly browned. Turn the heat off and remove the chicken, leaving the oil and bits in the pan, and set aside.

2. Turn the heat back on medium-high and add the garlic and onions. Saute for about 2 minutes or until the onions are starting to turn translucent. Add the spinach, artichokes, nutmeg, and about 1/4 tsp of salt and pepper; stir together and continue to cook for an additional 1-2 minutes. Add the butter and after it melts down into the mixture, sprinkle in the flour and then use a whisk to combine everything together. The mixture should thicken up and be slightly dry looking-- cook for 1 minute. Slowly pour in the milk and continuously stir until  the mixture becomes very thick (about 3-4 minutes on a medium flame). Add the parmesan cheese, gouda, and season with additional salt and pepper to taste. Replace the cooked chicken back into the pan and stir to combine altogether. Turn off the flame.

3. Carefully pour the pot pie filling into the pie or baking dish. Cover with the rolled out pie dough and fold over and/or cinch the sides to create a decorative border. Pinch down the sides gently and use a knife to create a few 1" slits on top for steam to escape. Beat the egg in a separate bowl and gently brush it over the surface. Season with a little additional salt and pepper on top, if desired. Bake at 375 degrees F for about 20 minutes, or just until the crust has become a golden brown. Remove and allow it to cool for a few minutes before serving.

Pie Dough
2 cups all purpose flour
1 cup unsalted butter, cold and cubed
1 tsp salt
1/4 cup cold water


1. In a food processor, pulse together flour, and salt, to combine. Add cubed butter and process until mixture is crumbly and pea-sized balls form. While food processor is on, slowly stream in cold water until a loose ball of dough forms. Remove from processor and gently knead together; wrap tightly with plastic wrap and place in fridge for at least 30 minutes (if storing longer than 30 minutes, remove and let it sit for about 10 minutes so the dough is not too hard to roll out).

Wednesday, December 7, 2011

Wear What You Eat


Wear this Ellie Eternity Scarf by Bearded Owls Hoot on Etsy  during these cold weather months and eat this scrumptious strawberry cupcake with strawberry meringue buttercream from Martha Stewart.

One-Bowl Wonder Brownies

Sometimes, I get a craving for something sweet and decadent. Often times, I crinkle my nose at the thought of processed sweets or pre-made grocery store desserts. Usually, there isn't a unique and taste-bud worthy bakery around when I want there to be.


It's a good thing that these chewy, moist, and satisfying chocolate brownies took one bowl to prepare in and about 30 minutes to bake. That's what I call a one-bowl wonder.

Did I mention that there's a good amount of non-fat Greek yogurt included to swap out some oil? Did I also mention that their still so delicious that my fiancĂ© didn't even notice? And, trust me-- he's got the kind of sweet tooth to notice. ;)

One-Bowl Wonder Brownies (made with Greek yogurt)
this recipe is for one 9x13" baking pan 


1/2 cup canola oil
1/2 cup non-fat Greek yogurt
1 cup white sugar
1 cup brown sugar
3/4 cup dark unprocessed cocoa powder
1 cup + 3 tbsp all purpose flour
1/2 tsp baking powder
1/4 tsp salt
4 large eggs
1 tsp vanilla extract
1 tsp hazelnut liquor 
*optional add-ins: walnuts, chocolate chips


Preheat the oven to 350 degrees F.


1. In a stand mixer, using the paddle attachment, (or with a hand held mixer and a large bowl) mix together the canola oil and Greek yogurt on medium until well combined. Reduce the speed to low and mix in the white and brown sugar, cocoa powder, flour, baking powder, salt, eggs (one at a time), vanilla extract, and hazelnut liquor. If you are choosing to add chocolate chips or nuts, gently fold them in at this point.


2. Pour the batter into a lightly buttered and floured 9x13" baking dish and smooth over the top with a rubber spatula. Bake for 30 minutes, remove from the oven, and allow to cool before handling and eating.

Wednesday, November 30, 2011

Wedding Wednesday: Photography

Since our engagement in the summer, my fiance and I have started to get extra excited as the months pass by. Although we have a good while until our wedding month, September 2012, comes, the both of us have eagerly thought of details regarding our day. We are trying to get as many things taken care of since time is on our side to prevent crazy stress-city.

As soon as we became engaged, we quickly tried to find two things: 1) a venue with suitable date and 2) our photographer. However, our route towards booking these two details were a little out of the ordinary compared to most couples and we worked around our photographer's schedule prior to setting a date. Why? It's simply because I fell in love with the work of Stephanie Williams since I first came across her photos about 3 years ago.


Stephanie and her husband, Isaac, work as a team to provide amazing documentation of weddings and other celebrations. Together, they produce photographs that are filled with beautiful luminosity and definitely capture the pure romance, love, and joy from each happy moment.  Additionally, their creative and whimsical work totally connected with our style and personalities. My fiance and I searched for comparable photographers and did find a few we liked, but none that we adored as much. When my future husband described the photos as having "some sort of...magic", I knew we couldn't go with any other artist! 

We are anxiously looking forward to our engagement photo session in the spring and for Stephanie to capture the first day we stand together as husband and wife in the fall!


Both of us knew that finding the perfect photographer was going to make the wedding even more special. The photos and memories within them are going to last forever! 

Monday, November 21, 2011

Weekend Tidbits

Happy Monday! I hope you all had a restful weekend. I definitely did and I am so excited that the relaxation will continue after just one more day of work-- Thanksgiving, here I come. :) 


Some weekend tidbits, in order from left to right: 1) The sweetest date at Tuli Bistro featuring a pumpkin and proscuitto pizza and lamb briyani ravioli 2) A lovely set of classic and must-read worthy cookbooks 3) Ellie's friendly and big ol' nose greeting me alongside Saturday morning's sunrise 4)The best-ever mocha blanc made with white chocolate ganache 5) A simple Sunday lunch including brie, red pear, turkey, and honey paninis and 6) A festive batch of homemade maple pumpkin cupcakes with maple-ginger frosting topped off with cinnamon and spice macron crumbles.


Wednesday, November 16, 2011

Who I Want to Be

A woman with poise and class. Elegant yet quirky. On a path filled with continual growth and learning. Courageous and confident to take risks. A cup that will overflow with positivity. Eclectic. Adventurous. Productive. Proactive. Capable to turn trials around. Determined to look for the greener side of things. Feminine yet a little rough around the edges. Slow to anger, quick to forgive. The type of person who leaves meaningful impressions on the lives of others. A woman you can count on to make you smile, give you support, and give you hugs. A woman who you can count on to be realistic and honest. The kind of person with pretty dresses? Yes, please. The girl with cute shoes-- always. A woman who knows what she wants and remembers to stay true to herself and her beliefs as she works towards anything. Patient. Strong. Secure. Someone who remembers to r-e-l-a-x.

The kind of woman who shows love in everything she does. A bride. Wife. Mother. Faithful sister and daughter. A life partner filled with reasonableness, support, an open mind, and a warm heart. A wife who will work for her marriage and never give up. Nurturing and generous. Loving and compassionate. Responsible and assertive.  A wife and mother you can turn to. Someone who brings out the best in her husband. Someone who shares her emotions. The kind of person who always make the best chocolate chip cookies. Someone who values Saturday morning pancake breakfasts. Best-ever-hostess. A cleaner. An organizer. A fun date! 

A friend you can count on. A shoulder you can cry on. Someone who will bring you food-- just because. Spontaneous. Genuine and true. Loyal. The kind of friend who will always have a cold beer in the fridge, ice cream in the freezer, and a cheesy chick-flick available. Someone who you can call in the middle of the night. A good shopping buddy. A better chit-chat buddy. Encouraging and reliable. Ready to help you see error in your ways, but eager to help you change for the better. Someone who remembers your birthday. Someone who will always shine a smile your way.

A woman who's life is filled with joy. Creative and domestic. Baker and chef. Educator. Teacher. Someone who will live for the simplest pleasures. The kind of person who will always strive to create a life attributed with whimsy, beauty, and refined touches. Someone who will share these parts of her life with the people around her. Someone who lives in a quaint and charming place. Stylish. Humble. Modern. Classic. A healthy eater. A every-once-in-a-while junk food eater. The kind of person who takes care of her body. The kind of person who takes care of her soul. A woman who always wears what she loves. Someone who yearns to learn new tasks and take on new skills.  The kind of person who knows that life is a journey and every experience and person along the way help make it richer. The kind of person who accepts mistakes because she knows they are necessary for success and growth.

And...someone who shows the glory of God in all that she does (1 Cor 10:31). The kind of woman who will put God first and fill her family with reminders of His grace and blessings. A steward. Gracious. Forever thankful. Someone who fears the Lord.

(all images via pinterest)

Monday, November 14, 2011

Wear What You Eat


I just saw this amazing and must eat Purple Ombre Cake from Raspberri Cupcakes and was inspired to wear a collected spread of Essie plum ombre colors. Mmm...lovely!

Essie nail colors: 1. Damsel in Distress; 2. Merino Cool; 3. Liliacism; 4. Minimalistic

Tuesday, November 8, 2011

Shrimp and Chicken Paella

When I think of paella, sadly the first thing that comes to mind is the crummy version of the dish the dining hall used to serve when I was a freshman in college. This is mostly due to that fact that, unfortunately, I never experienced paella till then. I remember feeling extremely unsatisfied and walking over to get a plate of curly fries to fill my hungry and disappointed belly. 

Flash forward a few years and I finally get a taste of the real deal. Perfectly spiced, fluffy, savory, and oh-so-delicious paella from an authentic Spanish restaurant. I immediately became hooked on it! However, truth be told-- I never attempted to make the dish until this past weekend. I know, I am a lame excuse for a true paella lover. 


I followed Ina Garten's recipe for Lobster Paella, but substituted a few ingredients. Instead of lobster, I opted for shrimp (about 1 1/2 lbs; seasoned with salt, pepper, cayenne pepper, olive oil; roasted in the oven in 375 degrees F for about 10-15 minutes), added chicken (about 1 lb), and used a leaner turkey Kielbasa. The recipe also called for a bit of licorice flavored liqueur, such as Pernod or Absinthe, but I didn't have any available. Also, I was very skeptical at the thought of using such an odd and distasteful flavor. However, several reviewers say that the ingredient does add an incredibly wonderful layer of flavor and perhaps when I have some of the liqueur on hand, I will give it a go. Until then, you just really need to know that the recipe is wonderful as is even without the Pernod.


Monday, October 24, 2011

Wear What You Eat


It's definitely autumn, here in California, so wear this warm and cozy Colorblock Minimalist Mockneck Sweater from J.Crew and eat this divine Deep-Dish Pumpkin-Meringue Pie from Martha Stewart.

Repeat the second step over and over...

Tuesday, October 18, 2011

Spinach Stuffed Citrus-Tilapia

Greetings! Here's a simple and healthy recipe for a busy Tuesday night. 

Keeping it short and sweet so I can get back to reading 5th grade research papers. ;) 


Spinach Stuffed Citrus-Tilapia
serves 4
inspired by this Whole Foods recipe

3 tbsp olive oil (divided use)
4 Tilapia fillets
2 1/2 cups fresh baby spinach
1 cup carrots, julienned
1 cup celery, julienned
1/4 cup finely diced scallions
1 navel orange (juice and zest)
1 medium lemon (to be cut into thin slices)
salt and pepper
1/4 tsp ground ginger
1/4 tsp ground nutmeg
fresh basil, for garnish
4 pieces of foil about 14' x 6' in size (for wrapping the fish)

Preheat the oven to 450 degrees F.

1. Heat the olive oil in a large sautĂ© pan on a medium flame. Once heated, add about half of the scallions, carrots, and celery. Season lightly with salt and pepper. Add the spinach and continue to cook for about 5-6 minutes or until carrots are slightly tender and the spinach has wilted down. Add the nutmeg and ginger before stirring and cooking for an additional minute. Turn off the heat and add the zest and juice of the entire orange then stir well to combine. Season with salt and pepper to taste.

2. Place each fillet of tilapia near the center of each piece of foil. Lightly season each side with salt, pepper, and the remaining oil. Next, take a portion of the spinach mixture and spoon it gently onto the middle of each fillet. Gently roll the fish over while keeping the spinach stuffing inside; keep stuffed fillets on their seam sides down. Lightly season with a little more salt and pepper, place a slice of lemon over each piece, and divide the remaining scallions for each portion and add them on top. Loosely wrap the fish in the foil by creating an envelope and gently sealing the edges by folding them shut (keep the lemon side of the fish up). Allow the wrapped fish to sit on a baking sheet and bake for 15-17 minutes. Carefully remove each package and use a spatula to plate the fish. Garnish with chopped basil and enjoy! :)

Wednesday, September 28, 2011

Polenta Biscotti

I enjoy making simple cookies and snacks that are require minimal effort, but provide great satisfaction and joy. Biscotti is one of these cookies and baking a batch never becomes old to me. Here's a recipe for an interesting twist on a classic-- polenta biscotti! The added ingredient adds in interesting and subtle flavor with a bit more texture and crunch. Give this a go! You're tummy will thank you.


Polenta Biscotti
makes about 1 dozen pieces

2 cups all purpose flour
2/3 cup polenta
1 1/2 tsp baking powder
1/4 tsp salt
1/4 cup (4 tbsp) unsalted butter, cubed at room temperature
1/4 cup olive oil
1 cup white sugar
2 eggs, lightly beaten
1 tsp real vanilla extract
3 tbsp hazelnut liqueur

Preheat the oven to 350 degrees F.

1.In a large bowl, mix together and combine the flour, polenta, baking powder, and salt.

2. In another mixing bowl, beat the butter and oil together until smooth; beat in the sugar and then the eggs-- one at a time. Stir in the vanilla extract and hazelnut liqueur.

3. Gently pour in the wet ingredients into the flour and polenta mixture; fold the ingredients together until well combined. The dough should be slightly sticky (not runny). Take the dough out and place it on a lightly floured surface. Gently knead it together to shape it for about 30 seconds. Place the dough onto a prepared baking sheet that has been lined with parchment paper or a Silipat sheet. Shape the dough into an oblong mound that is about 12 inches long by 3-4 inches wide. Bake on the middle rack for 40 minutes. Remove and allow to cool on a rack for 25-30 minutes.

4. Use a serrated knife to cut 1 inch slices, on a diagonal bias. Place the cookies back on the prepared baking sheet with a cut side down. Return the cookies to the oven and bake for an additional 15 minutes. Allow the finished biscotti to cool completely before enjoying.

Monday, September 19, 2011

True Lunchbox Love


I don't know about you, but I love a good ol' PB and J sandwich. I loved them when I was a child, on my way to zero period in high school, as a poor college student, and even now as a poor elementary teacher. *wink*

Look how much fun he's having with that sandwich!
via


PB and J's are the ultimate lunchbox food in my book! I like mine with creamy PB and all natural blueberry preserves. What do you like yours with? 

Anyway, I found this cute video about the love that is Peanut Butter and Jelly. A simply adorable video to go with my short and simple post. I originally found this video on Huffington Post


Happy Monday, all! 

Wednesday, September 14, 2011

Wedding Wednesday

As some of you may know, the love of my life, and boyfriend of nearly 5 years, and I became engaged to be married about a month and half ago. Although planning the "the big stuff" and thinking about all the little details (we're our own planners!) has had it's share of being overwhelming so far, the fact that we're getting married (I'm getting married!!!) is so painfully satisfying and exciting for the both of us. I love to stop and let the thought "I'm going to spend the rest of my life with my best friend" resonate. Yea, yea...I know some of you are about to barf and probably not as a result of my previous post (see A Lesson in Excitement), but I can't help it-- I had to share it out a little. :)

Anyway, I read Style Me Pretty almost daily and enjoy getting inspiration from real weddings that are featured. Today, I stumbled upon a little video a couple from Seattle, John and Jessica, had created by a very talented Alec Cattarin. This video seriously had me on the brink of tears for two reasons: 1) I'm a huge  romantic sap and 2) It made me envision our wedding day.

I just had to share this beautiful little video with you all.


It's so precious and sweet-- love is amazing!

Monday, September 12, 2011

Quinoa and Vegetable Stuffed Roasted Tomatoes

Tomatoes??

Ta-may-taaaahs!

This piece-of-cake vegetarian dinner has the ability to make you excited (or even more enthusiastic) about tomatoes. Packed with oh-so-good for you veggies and protein packed, wonder-of-a-grain, quinoa (and extra baked eggs on the side, if you'd like)...mama would be proud!


What's the best part for me (besides my tummy's gratitude, that is)? This was a total refrigerator and pantry-raid meal--brilliant meals come from frantic minds and hungry bellies!

Quinoa and Vegetable Stuffed Roasted Tomatoes
serves 4

3 1/2 tsp olive oil, divided use
4 medium-large tomatoes
1/3 cup dry red quinoa
2/3 cup water
1/2 cup diced carrots (about 2 small-medium carrots)
1/3 cup chopped green onions
2 garlic cloves, minced
1 1/4 cup diced portabella mushrooms
1/4 cup sun-dried tomatoes (I prefer the kind in jars packed with olive oil), finely chopped
2 1/2 tsp salt, divided use
3/4 tsp pepper, divided use
1/4 tsp ground cumin
1/2 tsp dried oregano
1/2 tsp dried basil
3/4 cup grated parmigiano-reggiano  cheese, divided use
1/4 cup triple cream or brie cheese (without the rind)
1/4 cup panko bread crumbs

*for additional baked eggs you will need 4 large eggs.

Preheat the oven to 350 degrees F.

1. Cut about one inch of the tops off of each tomato. Carefully use a spoon and/or a knife to remove "insides" of each tomato; make sure to be careful and not cut through the body. Set aside the removed tomato bits and place the empty cavities into a small, yet deep, baking dish coated with 1 tbsp of olive oil.

2. In a small-medium saucepot, combine the dry red quinoa, water, and 1/2 tsp salt. Stir and bring to a boil; reduce to a simmer, cover, and allow quinoa to cook for about 10-15 minutes. Quinoa is cooked when grain begins to turn translucent, the spiral-like germ has begun to separate, and almost all of the water has been absorbed.

3. While the quinoa is cooking, heat 1 1/2 tsp of olive oil in a saute pan. Add the carrots green onion, and garlic--season with a pinch of salt and stir to cook; saute for about 3 mninutes on medium heat. Add the mushrooms, sun-dried tomatoes, and continue to stir and cook for an additional 4-5 minutes. When the quinoa is cooked, add it into the vegetable mixture and stir to combine. Add the remaining salt, pepper, cumino, oregano, basil, 1/4 cup of grated parmesano-reggiano cheese, and triple cream (or brie) cheese. Take half of the removed tomato parts (do not add the juice), coarsely chop it up, and add it to the pan. Continue to stir and cook for another 2-3 minutes on low-- cheese should be melted and well combined into the mixture.

4. Sprinkle  1/4 cup of the grated parmgiano-reggiano cheese into each tomato; divide 1 tsp of salt and 1/4 tsp of pepper into and on the exterior of each of the tomatoes for extra seasoning. Gently scoop and pat down even amounts of the vegetable filling into each empty tomato until all of it has been used. Evenly sprinkle the panko bread crumbs and the remaining 1/4 cup of grated parmigiano-reggiano cheese atop the tomatoes. Take the tomato caps and gently squeeze them in between the tomatos where some room exists. Drizzle the remaining 1 tbsp of olive oil across the tomatoes and roast them for about 40-45 minutes on the middle rack. *optional: crack each of the eggs into empty spaces in the baking dish after 20 minutes of cooking time.* Panko and cheese crust should be golden brown.

Friday, September 9, 2011

Wear What you Eat


Wear these charming little oxford wedges from Ruche and eat these melt-in-your-mouth homemade caramels from The Kitchn  (I made them before here).

Happy Weekend! I hope you're celebrating, too!

Wednesday, September 7, 2011

Birthday Cake Whoopie Pies

My older brother loves good ol' fashioned white cake with buttercream frosting. Ever since I can remember, it has always been his cake of choice for birthdays and celebrations. Any other more unique cake just won't do-- there's no substitute for a slice of this simple cake.


When he moved up to Northern California to embark on a new career path, I was thrilled since he would be much closer to me. To celebrate, I wanted to bake him something sweet and delightful. I immediately thought of making him a cake, but knew he wouldn't eat much of it so I opted for something much more portable and snackable-- whoopie pies! Yup, I made Birthday Cake Whoopie Pies. Not only did they taste just like a traditional and simple birthday cake, they were adorable to package...and eat.


 I know these really weren't for a birthday, but any day can feel like one when you've got these cuties around to munch on. 


Birthday Cake Whoopie Pies
1 package white cake mix
3 eggs 
1/2 cup of water
1/2 cup of vegetable oil
3 cups powdered sugar
1 cup (2 sticks) unsalted butter
1 tsp vanilla extract
1-2 tbsp heavy cream
food color gel of choice
sprinkles of choice


Preheat oven to 350 degrees F.

1. Use a mixer to combine cake mix, eggs, water, and oil.  Beat this together for a few minutes until mixture is well combined, light, and fluffy.
;)
2. Fill a piping bag with the batter and pipe rounds in approximately 1-2"diameter on prepared baking sheets lined with parchment paper or Silpat (you could also just gently spoon out the batter then use the back of the spoon to smooth the round out). Be sure to leave about 2" between each mound. Bake for about 8-10 minutes or just until lightly golden brown. Allow these cake cookies to cool completely.


3. Meanwhile, using a mixer with a whisk attachment, beat together the sugar and butter. Mix this on low until everything is well blended then continue to mix on medium-high for another 2-3 minutes.  Add vanilla and heavy cream while continuing to beat for another minute. Add desired amount of food color and beat for another minute until the desired hue is reached.  Mixture should be firm, yet smooth. 


4. Fill another piping bag with the buttercream and generously pipe the back of a cooled cake cookie. Place another cake cookie on top of the buttercream; gently shake sprinkles onto the sides of the whoopie pie while turning it so all sides are lightly covered. Repeat with the remaining cake cookies and frosting. 
Store in an air-tight container...or consume immediately. 

Tuesday, September 6, 2011

Library Day

Currently Reading...

The Blind Contessa's New Machine by Carey Wallace
This is a charming fictional story based on the true events of Carolina Fantoni, an Italian woman from the 1800's, and her emotional and gradual journey towards losing her sight and strengthening her soul. No one believes she is truly going blind except for an inventor, Turri. Both grow closer in several ways as Turri works on a new invention to help Carolina communicate with the world. Through acts of love and support a writing machine that changes everything is born-- one of the first typewriters.

Crazy Love by Francis Chan
Francis Chan shares his experiences and thoughts as he picks apart the true meaning of being a Christian and genuinely loving God. He challenges Christians and readers to go beyond the "status quo" and fulfill their hunger for an authentic faith held together with "tangible and even radical solutions". Chan states that Christianity is more than following a list of do's and don'ts, but rather truly and whole-heartedly falling in love with God-- because once you're wildly in love with someone, it changes everything.

The Persian Pickle Club by Sandra Dallas
Sandra Dallas magically takes readers through the 1930's while Harveyville, Kansas struggles with the hard hit of the Great Depression. A young farm wife, Queenie Bean, is part of a weekly gathering of local women-- the Persian Pickle Club. In this club, the ladies focus on exchanging good ol' gossip, quilting, and over all improving the minds and souls. However, when a deep and dark secret is brought to the group, the women of Harveyville learn to stick together in order to support and protect through good times and bad times alike.


Friday, August 26, 2011

Better for You Blueberry-Almond Crumb Bars

Awhile ago, when I was still blogging on Yumology, I made some Whole-Wheat Blueberry Crumb Bars. Well, just when I didn't think I could make them better-- I did!

These crumb bars contain everything good for you and are mom (and tummy) approved. I loaded these with fantastic grains including whole-wheat, steel cut oats, and old fashioned oats. These ingredients make for a very filling bar that is great for a snack, breakfast, and/or dessert. Additionally, instead of a ton of butter, I used just a tad and used almond butter with flax seed to help attain the crumbly shortbread texture. Adding almond butter was such a great decision-- my belly told me so! These bars have a perfectly balanced flavor blend of delightfully sweet berries and wholesome almond butter and definitely channel memories of P.B. and J. lunches from my childhood with every bite.


Here I added a little scoop of coconut fro-yo...it was delish!


Better for You Blueberry-Almond Crumb Bars
makes 12-16 2-3" squares

1 1/2 cup whole wheat flour
1 cup quick cooking steel cut oats
1/2 cup old fashioned oats
1/2 tsp salt
1 cup organic white sugar (divided use)
1/2 tsp baking soda
5 tbsp cold butter, cut into cubes
1/2 cup almond butter
2 cups fresh blueberries
1/4 cup honey
2 tbsp lemon juice
2 tbsp cornstarch
additional sliced almonds.

Preheat oven to 375 degrees F.

1. In a food processor, pulse together the whole wheat flour, steel cut oats, old fashioned oats, salt, 3/4 cup of organic white sugar, and baking soda. Add the cold butter and pulse a few times. Add the almond butter and pulse the mixture again until a coarse crumbly texture with pea-sized balls of dough is achieved. Reserve 2 cups of the mixture for later and pour the rest into an lightly greased 8x8" baking dish. Pat down and compact the mixture well into the dish. Set aside.

2. In a medium-small sauce pot, stir together the blueberries, honey, remaining 1/4 cup organic white sugar, and lemon juice. Bring the mixture to a simmer and continue to cook on medium-low heat until the berries break down and the sugars are well dissolved. Add the cornstarch and continue to cook and stir until the mixture becomes quite thick. Turn off the heat and pour it all on top of the prepared crust; use a spatula to gently spread the blueberry mixture evenly around the dish. Evenly top with the remaining crumb mixture; pat down well when finished. Sprinkle additional sliced almonds on top, if desired.

3. Bake in the oven on the middle rack for 25-30 minutes. Crust should be golden brown. Allow the baked crumb bars to cool for 10-20 minutes for easier cutting and serving-- bars will be very crumbly regardless, but will fall apart less if you wait a bit before chowing down. :)

Thursday, August 25, 2011

Wear What You Drink


Wear this darling Sky Stories Dress from Anthropologie (on sale now!) with cool and natural tones that will easily transition into fall with boots and a cardigan and drink this comforting Masala Chai Tea Latte from the velvet bird.

Tuesday, August 23, 2011

Tuesday Night Dinna'!

  • In my personal opinion, Cooking Light is a wonderful resource for delicious and healthy recipes. I often browse through their site and become inspired by some of their cookbooks that I own. This chicken recipe is a yum-dum-diggity variation of Cooking Light's Crunchy Shrimp with Toasted Couscous and Orange Ginger Sauce. If you're looking for an easy recipe that allows you to work with a variety of protein options, I highly recommend this one. Although it calls for shrimp, I have found that chicken and fish are also great friends. However, if you do decide to use fish, I suggest opting out of cutting your fillets into pieces and either pan-searing or roasting them. 
Now, enough reading--more eating!


  • Crunchy Chicken with Toasted Whole-Wheat Couscous and Orange Ginger Sauce
  • *adapted from here 
  • serves 4

  • Sauce:
  • 1 cup orange juice
  • 1 tablespoon chopped fresh cilantro
  • 2 tablespoons reduced-fat mayonnaise
  • 1 1/2 tablespoons fat-free, less-sodium chicken broth
  • 1 teaspoon grated peeled fresh ginger
  • 1 teaspoon fresh lime juice
  • 1/2 teaspoon ground cumin
  • 1/4 teaspoon salt
  • 1/4 teaspoon ground red pepper
  • Couscous:
  • 1 cup uncooked couscous
  • 1 1/2 cups fat-free, less-sodium chicken broth
  • 1/2 cup orange juice
  • 1/2 teaspoon salt
  • 1/3 cup chopped green onions
  • 2 tablespoons sliced almonds, toasted
  • 1 tablespoon unsalted butter
  • Chicken:
  • 3/4 - 1 lb uncooked chicken breast, cut into bite-size chunks
  • large egg white, lightly beaten
  • 1/2 cup panko (Japanese breadcrumbs)
  • 1 teaspoon chopped fresh cilantro
  • 1/2 teaspoon grated peeled fresh ginger
  • 1/8 teaspoon freshly ground black pepper
  • 1 tablespoon canola oil

  • 1. To prepare sauce, bring 1 cup orange juice to a boil in a small saucepan over medium-high heat; cook until reduced to 1/4 cup (about 10 minutes). Remove from heat; cool completely. Stir in 1 tablespoon cilantro and next 7 ingredients (through red pepper); set aside.
  • 2. To prepare couscous, place couscous in a large nonstick skillet over medium-high heat; cook 3 minutes or until toasted, stirring constantly. Add 1 1/2 cups broth, 1/2 cup orange juice, and 1/2 teaspoon salt; bring to a boil. Remove from heat; cover and let stand 5 minutes. Fluff with a fork; add onions, almonds, and butter, stirring until butter melts. Keep warm.
  • 3. To prepare chicken, combine chicken and egg white in a large bowl, tossing to coat. Combine the panko, 1 teaspoon cilantro, 1/2 teaspoon ginger, and black pepper in a large zip-top plastic bag. Add shrimp to the bag, and seal and shake to coat.
  • 4. Heat oil in a large nonstick skillet over medium-high heat; arrange shrimp in a single layer in pan. Cook 2 minutes on each side or until done.
  • 5. Place 3/4 cup couscous on each of 4 plates; top each with a portion of chicken. Drizzle each with 1 1/2 tablespoons sauce. Garnish with extra almonds and cilantro, if desired.