Showing posts with label healthy eating. Show all posts

Thursday, November 7, 2013

How to Get More Dates in Your Life

Before I met my husband, I would have loved knowing the truth behind getting more dates. I just never had any luck.

Maybe it was me-- I blame myself. I kept looking for the wrong kind of dates.

Some girls sought after dates just for their looks. Others wanted dates that made them laugh and yet were still mature. What did I want? 

I just wanted my dates to be pitted and easy to eat! They are loaded with fantastic nutrients and taste delicious. I especially love when they are in natural and wholesome energy snack bars, such as Larabars. In fact, the Larabar is the inspiration behind these homemade Lemon and Coconut Date Bars. When they're cut into little bit-size pieces, they are so easy and great for healthy snacking! The perfect way to get more dates in your life!
 Wait...what kind of dates were you talking about? 

Lemon and Coconut Date Bars
makes about four 4" x 1" bars or 16 1" square bites

3 cups whole pitted and dried dates
1/2 cup shredded unsweetened coconut
1/4 cup dry old-fashioned oats
2 tsp natural lemon extract (or lemon zest)
1 tsp vanilla extract
1/2 tsp kosher salt

1. Put everything into a food processor and process the mixture until a thick paste-like mass has formed. The dates won't become completely smooth.
2. Transfer the mixture onto a flat surface lined with plastic wrap. Use your hands to flatten and compact the mixture until it's a square about  4" x 4" x 1". Make sure that everything is as tightly compacted as possible and then wrap the square well. You can use a baking sheet or pan to press the square down so that both sides are flat and smooth. Also, by pushing the square into the corner of a baking pan/sheet, you can attain nicer and more even corners. Let this rest for at least 2-3 hours before cutting the square into bars or smaller bite size pieces.
3. To store, keep them in a sealed container or wrap them up well.


Tuesday, July 23, 2013

Seared Skirt Steak Salad with Lime-Ginger Vinaigrette

Henry and I are "bad" Asians.

He is Vietnamese and I am Chinese (and part Cambodian). The number of times food of our culture appears in our home is miniscule. In fact, we consume brown rice (stead of white) and the 10 lb. bag I purchased almost a year ago still filled up nearly all of its storage container up until a few days ago when we had to toss it due to the development of pantry moths in the batch (GROSS--I still have nightmares). I don't even have a bottle of soy sauce in the kitchen at the moment, our Siracha will most likely last us past the expiration date, and we didn't buy chopsticks until last April.

I told you, we're "bad" Asians.
We love Asian food, we just hardly consume or cook it for ourselves. However, when I do cook dishes that I learned from my mother, it is a pretty big deal. These include traditional dumplings, noodle soups, and basic stir-fry dishes. It's also a pretty noteworthy when I make Asian-inspired dishes-- mostly because I adore ginger and it's usually a key ingredient.

Too bad I use the pre-crushed ginger you can purchase in jars from the market. See? Bad Asian.

Sorry, mama. Now when you tell me to use a piece of ginger "the size of my thumb", I just use a measuring spoon. Eep!

Nevertheless, you can trust that this "bad" Asian, made a pretty amazing Asian-ish salad.

Henry and I eat a lot of greens and this meal is a great example of our usual complete-meal-definitely-not-just-romaine-and-croutons-salad. The best part about this skirt steak salad is the dressing-- if you don't prefer steak, you can easily substitute chicken for it (or even leave it out). Honestly, there's nothing to this dish besides finding whatever veggies look good to me or I have in the fridge. Tonight, I placed the skirt steak on top of a bed of mixed spring greens, arugula, spinach, shaved carrots, bell peppers, cilantro, avocado, and sliced almonds. A drizzle of the super flavorful and refreshing Lime-Ginger Vinaigrette ties everything together! Yum!

Seared Skirt Steak
adapted from Real Simple

1 1/4 lb skirt steak
salt and pepper
olive oil

1. If the skirt steak is quite large, cut it into sections so that it can fit on the skillet. Season both sides with salt and pepper to taste (I prefer about 1/4 tsp of salt and pepper per side). Heat about 1 tbsp of olive oil on a skillet. Add the steak and cook each side on medium-high heat for about 4-5 minutes for medium rare (or longer for your desired temperature). Transfer the meat to a cutting board and allow it to rest for 5-8 minutes before slicing it.

Lime-Ginger Vinaigrette
makes about 1/2 cup

2 tbsp olive oil
1 tbsp sesame oil
1 tbsp freshly grated ginger
1 1/2 tsp wasabi paste
1 tbsp honey
1/4 cup rice wine vinegar
juice of 1/2 large lime (about 1 tbsp)
1 tbsp sesame seeds
salt and pepper

1. In a small bowl, combine all the ingredients, except for salt and pepper. Use a whisk to thoroughly combine all the ingredients. Season with salt and pepper to taste.

Friday, April 26, 2013

Herb Quinoa Biscuits

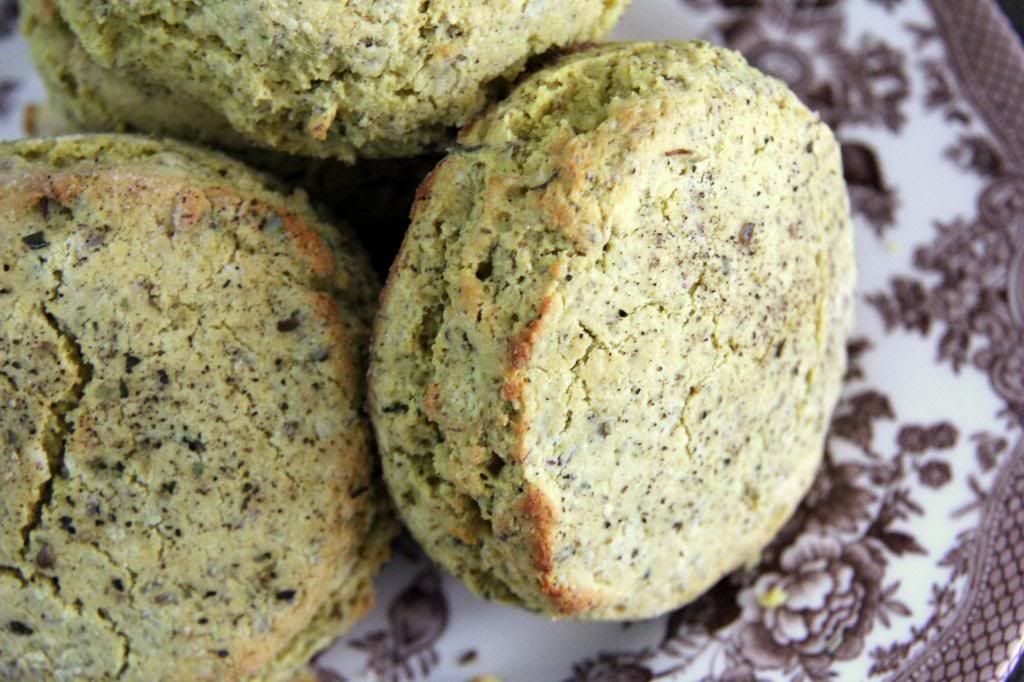
 Quinoa biscuits?! A baked doughy companion made with my favorite healthy "grain"?! I didn't even know the made quinoa flour!
 Until this week...when I plotted to find a way to use it in a baking to replace regular flour and then proceeded to add a bag of it into my shopping cart. 
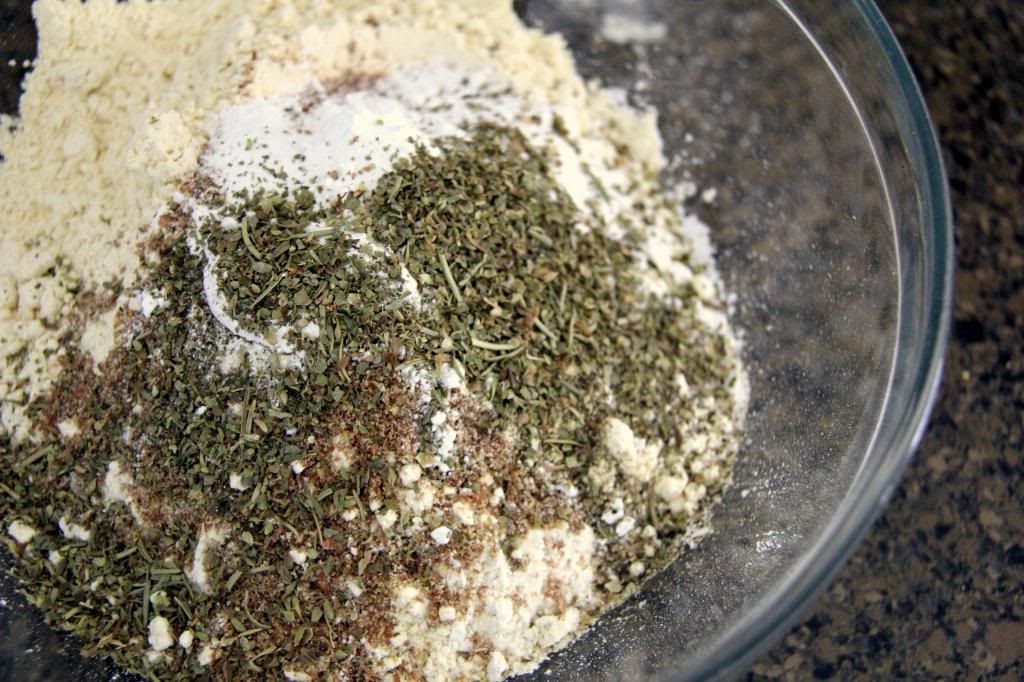
 I didn't look up any recipes that use quinoa flour prior to creating these biscuits so I wasn't really sure what to expect. I kept the process pretty simple and was intrigued by how my bowl of dry ingredients smelled like vegetables and quinoa. It had good health written all over it!
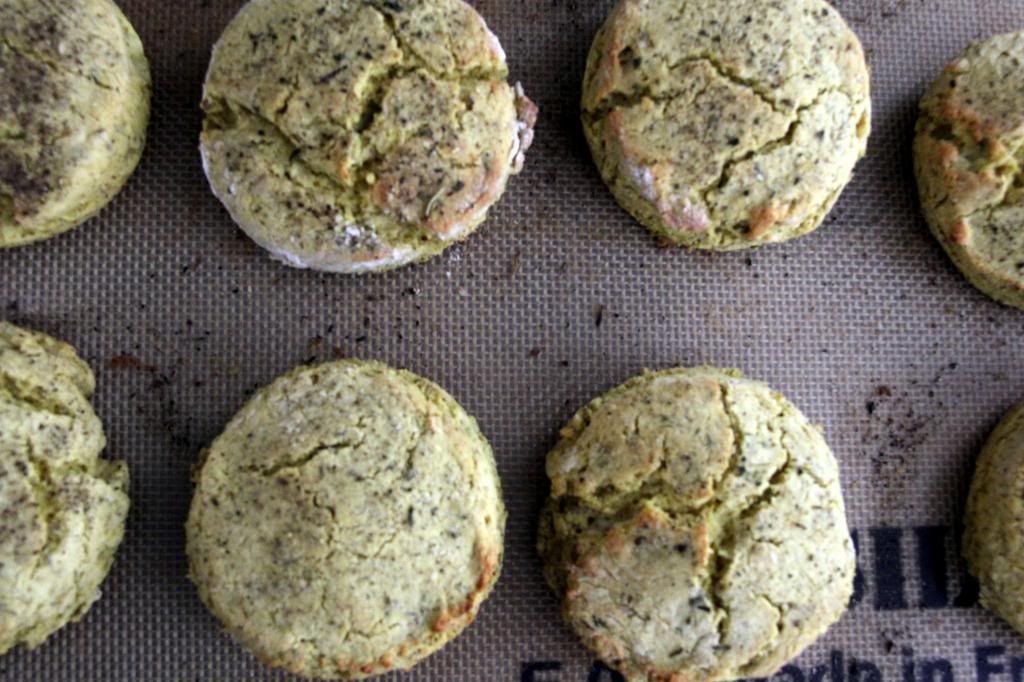
 These biscuits are surprisingly savory, dense, and flavorful-- a good partner to a bowl of soup or other warm meals. I was pleased to discover that their crumb was similar to that of regular biscuits, just a little less doughy. These guys taste great warm out of the oven and stayed pretty crisp the same day. However, if you're looking for a biscuit that will keep for the next day to enjoy with leftovers, be sure to pop them back in the oven for some re-toasting. 

Herb Quinoa Biscuits
makes eight approx. 3" biscuits

2 cups quinoa flour
1/4 cup flax meal
1 tbsp herbs de provence
3/4 tsp salt 
1/4 tsp pepper
4 tsp baking powder
2 tsp baking soda
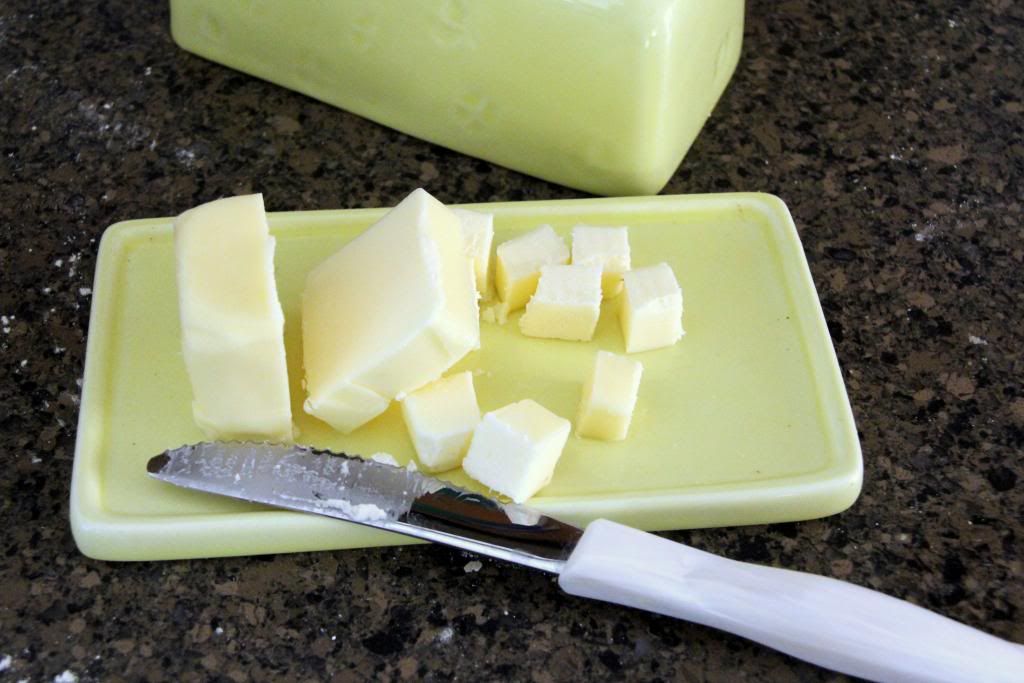
4 tbsp unsalted butter, cold and cubed
1 tbsp extra virgin olive oil (plus more for brushing)
1 cup fat free milk (or skim, low-fat buttermilk)

1. In a large bowl, throughly whisk together the quinoa flour, flax meal, herbs, salt, pepper, baking powder, and baking soda. Add the cubed butter and use your fingers to cut it into the dry ingredients-- move quickly because you don't want the butter to melt (the mixture should appear like coarse sand). Make a well in the middle and add the olive oil and milk. Use a fork to mix everything together-- the batter will be sticky.

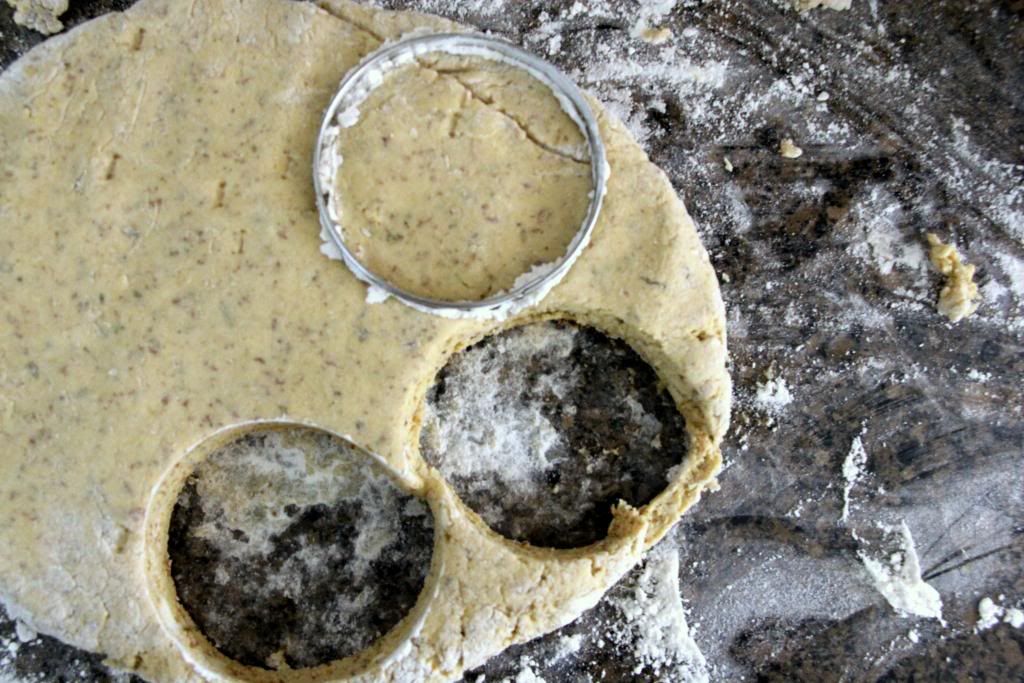
2. Transfer the dough onto a well floured surface (since quinoa flour is pretty pricey, I used whole wheat flour-- it doesn't really matter). Use your hands to gently knead and fold the dough over a few times. Pat it down with your hands, or a small rolling pin, until the dough is about one inch in thickness. Dip an approximate 3" circle cookie/biscuit butter (or a cup/any cutter you want to use) into the flour and cut out biscuits to place on a baking sheet lined with parchment paper or a non-stick sheet. Brush the tops of each biscuit with olive oil.

3. Bake the biscuits in  a 450 degree oven for about 10-15 minutes or until the biscuits are browned and golden.


Monday, April 22, 2013

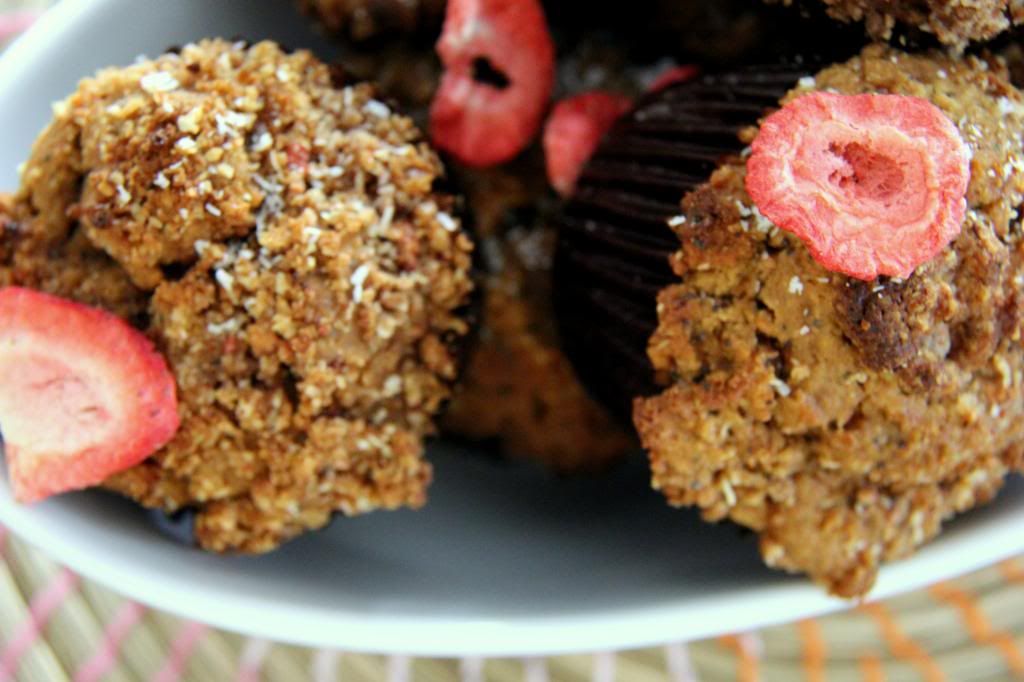
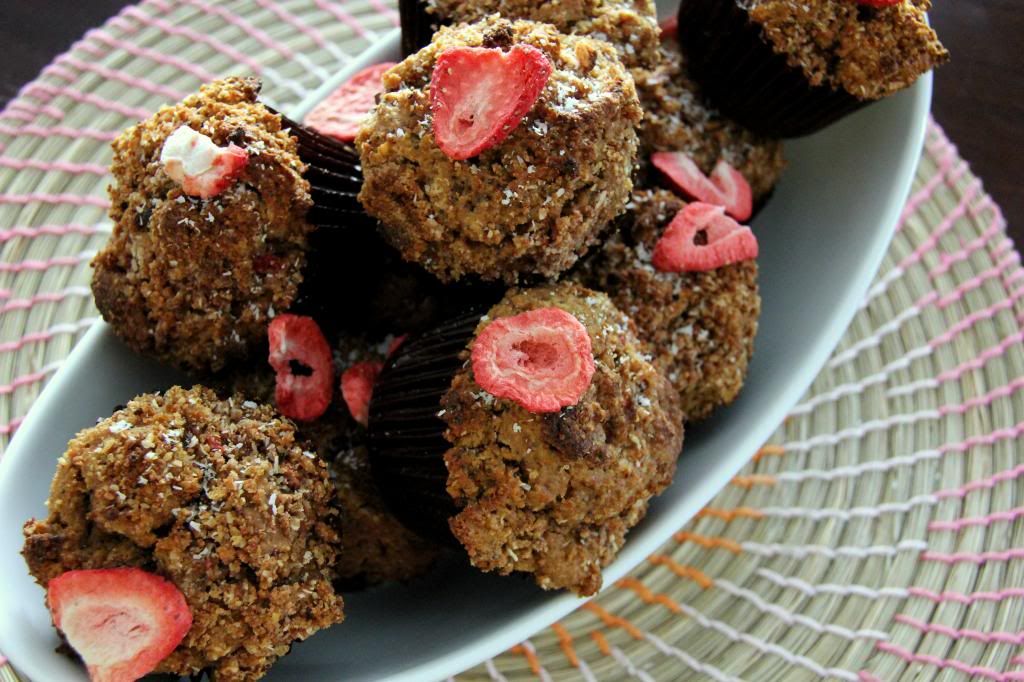
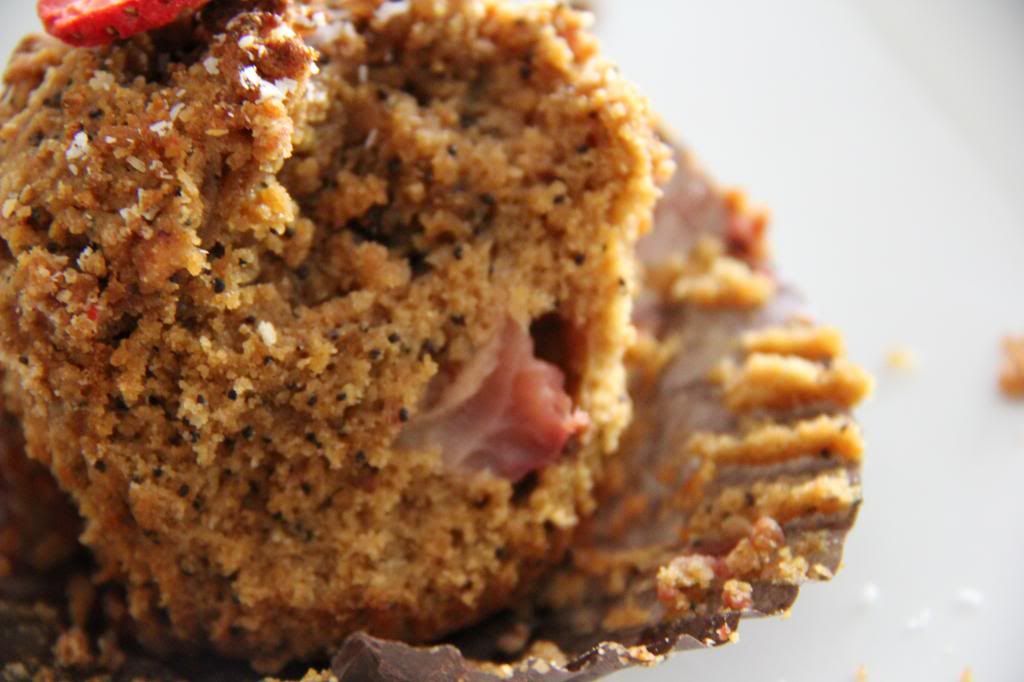
Whole-Grain Strawberry-Coconut Muffins

 In this world, not all muffins are created equal. Sorry, that's just the way it is. Fortunately, these Strawberry-Coconut Muffins leave you feeling oh-so-good and satisfied you won't care about any other muffins. Well, only if you're into the good-for-you-and-made-with-healthy-wholesome-ingredients kind of thing.
I've been testing out several different recipes using coconut flour due to its high fiber and low-carb content. Although it can be tricky to work with, these muffins incorporate the unique flour without compromising a moist and tender crumb. To sweeten them up, all natural coconut sugar plays a major role along side fresh and dried strawberries.
Great for on the go, or easy and healthy snacking-- these muffins will surely curve your hunger as they are quite filling and tasty! Give them a go and let me know how you like them. Enjoy!

Whole-Grain Strawberry-Coconut Muffins
makes about 15 standard size muffins

1 1/2 cup whole wheat flour
3/4 cup oat flour
3/4 cup coconut flour
2 1/2 cup coconut sugar
1/4 cup finely ground unsweetened coconut (or flaked/shredded)
1/2 cup crushed freeze-dried strawberries
1/4 cup poppy seeds
4 tsp baking powder
1/2 tsp salt
1 tsp ground cinnamon
2/3 cup coconut oil (at a liquid state)
1 1/3 cup fat-free milk
2 tsp vanilla extract
1 1/2 tbsp orange zest
2 cups fresh strawberries, chopped

For the topping
1/4 cup (1/2 stick) cold unsalted butter, cut into small cubes
1 tbsp ground cinnamon
1/2 cup coconut sugar
1/4 cup finely ground unsweetened coconut
1/4 cup crushed freeze-dried strawberries
2 tbsp coconut flour
1/4 cup wheat germ

1. In a large mixing bowl, thoroughly whisk together the flours, sugar, coconut, freeze-dried strawberries, poppy seeds, baking soda, salt, and cinnamon.

2. In another medium bowl, combine the coconut oil, milk, vanilla extract, and orange zest.

3. In a small bowl, mix together the cinnamon, coconut sugar, ground coconut, dried strawberries, coconut flour, and wheat germ. Add the cold butter and use a fork or pastry cutter to blend the butter into the dry ingredients until everything is well incorporated-- the mixture should appear like crumbly sand.

4. Use a fork to gently mix the wet ingredients into the dry-- everything should still be slightly lumpy. Use a rubber spatula to gently fold in the fresh chopped strawberries. Use a standard size ice cream scoop to portion out the batter into a paper-lined muffin tray-- be sure that each cup is filled with a rounded scoop (these will not rise much so the amount you bake will basically be the size of your muffin). Sprinkle some of the topping onto each muffin. Bake in a 350 degree F muffin for 12-15 minutes until the tops are crisp and brown and a toothpick comes out clean when testing if they are done.


Wednesday, March 27, 2013

Alien Juice

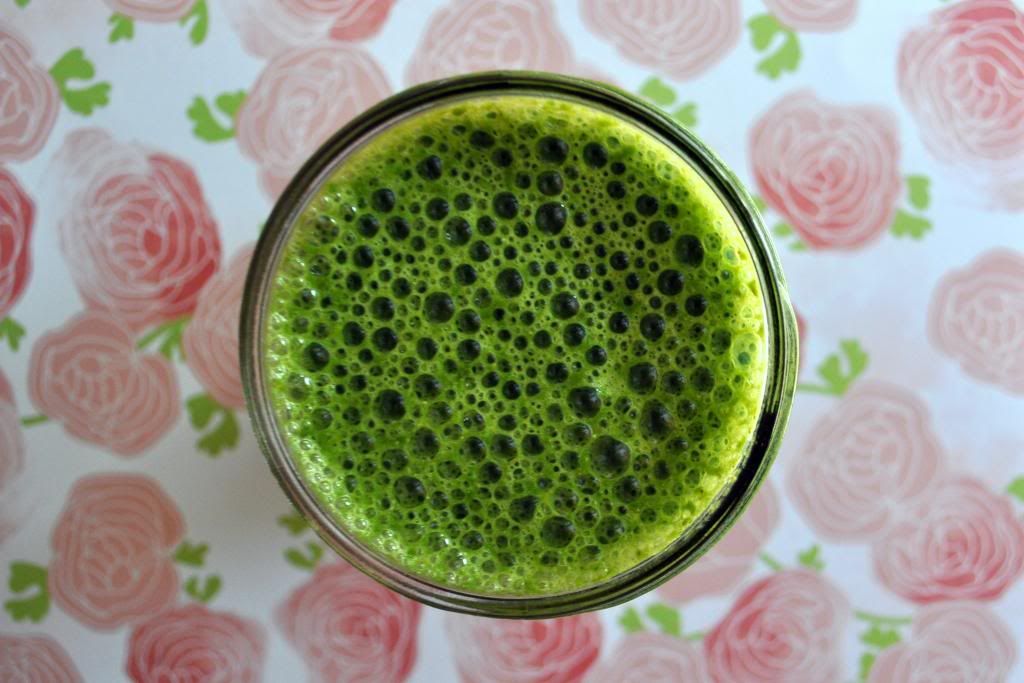
I know there are a ton of fantastic green smoothie recipes out there. Frankly, because they are so good for you and very simple to make, I am not surprised. Some of you may already be green smoothie fans and some of you may be weary of drinking anything that resembles the innards of a slimy green alien (appetizing, huh?). Regardless of your stance on the matter, I urge you to try this completely natural and dairy free spinach smoothie out! 

I have been blending this recipe up and enjoying it with my oatmeal and egg whites breakfast, for a few mornings in a row lately. It's very filling and refreshing. It even has great flavor-- the husband even loves it. 


After finishing off my own glass of this spinach smoothie this morning, I looked at Henry and thought about our future children. I told him that this was so easy to drink and a marvelous way of getting extra greens into our diet-- add a little more sweetness with fruit and I bet the kiddies would drink it. They may be more inclined to drink it if I called it "Alien Juice". Some kids are silly and dorky enough to love that kind of stuff. Knowing how the both of us are, I am kind of expecting to have those kinds of offspring. 

Cheers to clean eating!


Spinach Smoothie (with Chia Seeds & Ginger)
makes 1 serving

1 large handful of fresh baby spinach
1/4 cup natural & unsweetened applesauce
1 tbsp chia seeds
1 lime
1 1/2 tsp freshly grated ginger
1 1/2 cup unsweetened almond milk
Splenda *optional

1. Add all the ingredients, except the splenda, into a blender. Use the liquify setting and blend for about one minute. For more sweetness, add desired amount of Splenda to taste. If you'd rather use honey or agave, that would be fine, too. 
2. Serve immediately.
*Note: You can chill any leftovers, but the texture of the smoothie will become lumpy after awhile. The chia seeds will soak up moisture and create a curdled layer...I recommend drinking right away or leaving the chia seeds out.

Thursday, March 21, 2013

Gluten Free Coconut Pancakes

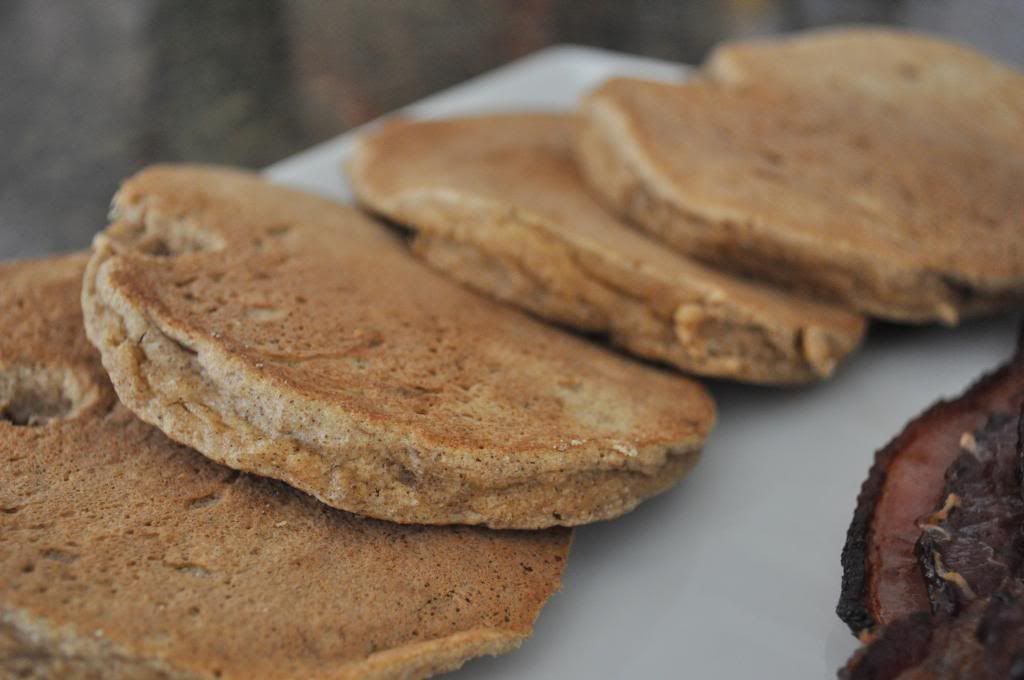
I know what you're thinking. Gluten free Pancakes? They are low-fat, low in sugar, and might as well have "EAT ME, I'M HEALTHY" written all over their little pancake tushies. Delicious? Fluffy? You're husband liked them? Yes, yes, and yes (two breakfasts in a row).
 

I've had to explore more gluten free options for everyday eating (as per doctor's suggestion). After several weeks of a pancake-less life, I came up with this recipe. These pancakes are full of coconut flavor with a little bit of cinnamon spice. They are sweet enough to enjoy without syrup, but of course the company of  it would be welcomed sweetly.


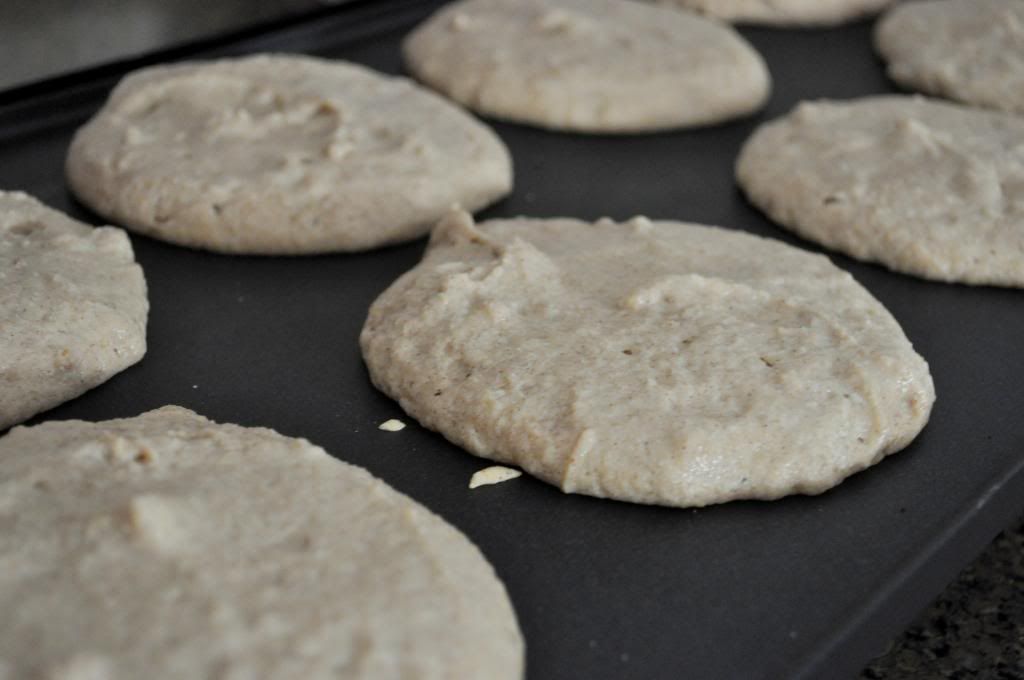
The secret to keeping these pancakes from being too dense and cake like is in the egg whites. Whenever I make pancakes, I prefer to whip the whites up separately until they form stiff peaks-- these guys are no  for exception. The addition of air truly makes a difference!

Sorry for the lack of pictures. On both occasions these pancakes were amazing. However the first time I was too busy eating to care about pictures. The next time, I repeated the offense after two photos. Point is: in the event of belly vs. photos, belly wins.

Gluten Free Coconut Pancakes
makes about 10 5-6" pancakes

1 1/4 cup coconut flour
3/4 cup gluten free oat flour
1 tsp baking powder
1/2 tsp baking soda
3 tsp ground cinnamon
1/2 tsp ground nutmeg
1/2 tsp salt
1/3 cup brown baking Splenda
3 eggs (separate yolks from whites)
3 tbsp coconut oil (in liquid form)
2 cups unsweetened almond milk
1 1/2 tsp vanilla extract

1. In a medium bowl, use a hand mixer to beat the separated egg whites until stiff peaks have formed. Set aside.

2. In a large bowl, whisk together the coconut flour, oat flour, baking powder, baking soda, cinnamon, nutmeg, salt, and brown baking Splenda. Make a well in the middle of the dry ingredients and pour and then mix in the egg yolks and coconut oil. Pour in the almond milk and gently whisk together. *Note: Coconut flour will absorb the liquid very quickly. If your batter still looks a little dense, add a little bit more almond milk until the right pancake consistency is achieved. Use a rubber spatula to gently fold in the beaten egg whites until the have been well incorporated.

3. Ladle about a 1/4 cup amount (I used an ice cream scoop) of batter onto a griddle heated to about 325 degrees F. (or medium heat). If you are not using a non-stick pan/griddle, be sure to grease your surface.  Cook each side of the pancakes for about 4 minutes, or until the edges are slightly crisp and lightly browned, before flipping. Cook an addition 4-5 minutes on the opposite side.


Monday, March 18, 2013

Recipe Repost: Low-Fat Sun Dried Tomato & Garlic Cream Pasta

Let's get one thing straight. I love pasta. It's an instant comfort food and easy weeknight meal. When smothered with the right sauce, it can be absolutely satisfying and divine.


Lately, though, I feel as if I had a bad break up with pasta. It's like the ex-carb of my love life. While writing this post, I realized that I haven't had any pasta for several months. Not even kidding, I think it's been since the spring of 2012. As I was watching my weight for my wedding, I reduced my simple carbohydrate consumption. Now, per doctor's orders, I am abstaining from eating wheat and gluten foods due to health reasons (related to my resignation from teaching).

To sum it up, I miss pasta. Sometimes I open up my pantry and look for the box of penne that once stood graciously in the back. I feel like I am looking for a ghost. The once-love-of-my-life. Sigh. Like all breakup's, I knew it was the right choice, it's just harder to move on than I expected. Oh, pasta. You'll never really know how much you I love you, still.

In honor of my ex-carb, I am reposting one of my favorite recipes I have made for an amazing pasta dish. The sauce for this dish is creamy and dreamy. Don't tell anyone that it's low-fat and they won't know the difference. Bon Appetit!


Sun-Dried Tomato & Garlic Cream Sauce
reposted from my old blog, "Yumology"
makes enough for approx. 1/3 lb of cooked pasta

3 tbsp unsalted butter
7 garlic cloves, minced
3 tbsp all-purpose flour
2 cups fat-free milk
1/2 cup chopped sun-dried tomatoes (I used a variation that was soaking in olive oil, but drained the oil)
3/4 cup freshly grated Parmesan cheese
1 1/4 tsp salt
1/4 tsp pepper

1. In a medium sauce pan, heat the butter on medium heat. When melted, add the garlic and cook for about 1 minute. Add the flour and whisk into the butter and garlic until a doughy texture is formed (this is your roux). Slowly pour and whisk in the milk until mixture is combined. Cook on medium heat while whisking continuously until sauce thickens (approx. 5-6 minutes). Add and stir in  the sun-dried tomatoes, cheese, salt, and pepper. Stir constantly and cook  for an additional 2 minutes. Turn off heat and add cooked pasta; toss pasta to coat in the sauce.

Tuesday, February 26, 2013

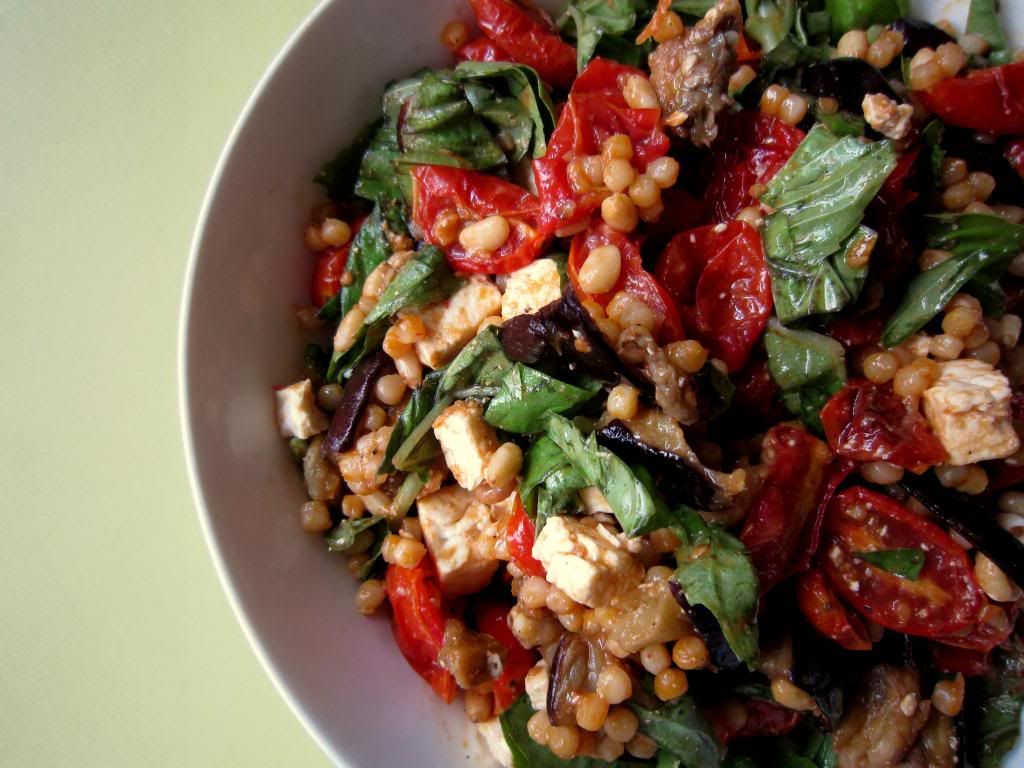
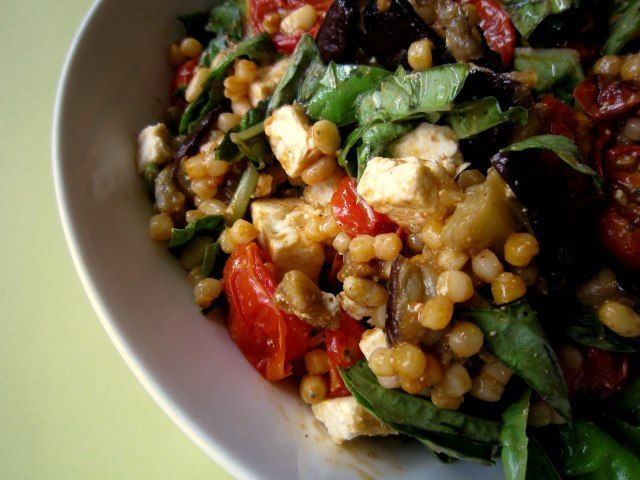
Recipe Repost: Roasted Eggplant & Tomato Couscous Salad


This is an old recipe I created a few years ago when I was still writing as "Yumology" on Wordpress. I wanted to re-post this salad because it is absolutely delicious. I love all the flavors present in this dish as they are warm and earthy with some mild sweetness, yet refreshing and light. Roasting vegetables always brings out a much more vibrant flavor and this salad is no exception. Give it a go! It's a lovely compliment as a side dish or even a meal in it's own. I am sure it would be great with some roasted chicken for more protein.


Roasted Eggplant & Tomato Couscous Salad
Makes about  4-5 cups
*the amount of vegetables looks like a lot, but they will reduce down after roasting*

3 cups cubed (about half of a medium sized eggplant) Italian eggplant
3 cups halved sugar plum tomatoes (or grape)
3 1/2 tbsp  extra virgin olive oil (divided use)
2 tsp salt (divided use)
1/2 tsp pepper (divided use)
1/2 cup Israeli couscous
1 cup low-sodium vegetable broth
1/4 cup water
1/4  cup light/reduced fat feta cheese, crumbled or cubed
2 cups chopped fresh basil leaves
1/4 cup dry roasted and unsalted pine nuts
salt and pepper

For the dressing:
3 tbsp red wine vinegar
1 tbsp balsamic vinegar
1 tbsp lemon juice
Preheat oven to 325ºF.

1. Place eggplant cubes on a lightly greased baking sheet in a single layer. Drizzle 1 tbsp of extra virgin olive oil over, sprinkle on 1 tsp salt and 1/4 tsp pepper, mix, and place back in a single layer. On separate, lightly greased, baking sheet, place halved tomatoes in a single layer with their interiors facing up. Drizzle 1 tbsp of extra virgin olive oil over, and sprinkle on 1 tsp salt and 1/4 tsp pepper. Bake for 45-50 minutes. Remove the baking sheets from the oven and let the vegetables cool.
2. In a small sauce pot on medium heat, heat up 1/2 tbsp extra virgin olive oil. Add couscous and stir. Cook until couscous becomes lightly browned (about 5 minutes). Meanwhile, in another small sauce pot, bring the vegetable broth and water mixture to a low boil. After the couscous is browned, slowly pour in the boiling broth mixture and stir. Bring couscous and broth to a low boil, reduce heat to medium-low, and simmer until couscous has absorbed liquids (about 12 minutes). Season lightly with salt to taste. Remove from heat and set aside.
3. In a small bowl, combine ingredients for dressing. In large bowl, combine the couscous, eggplant, tomatoes, pine nuts, feta cheese, and basil. Pour in the dressing and mix gently to combine.  Season with salt and pepper to taste.

Monday, February 25, 2013

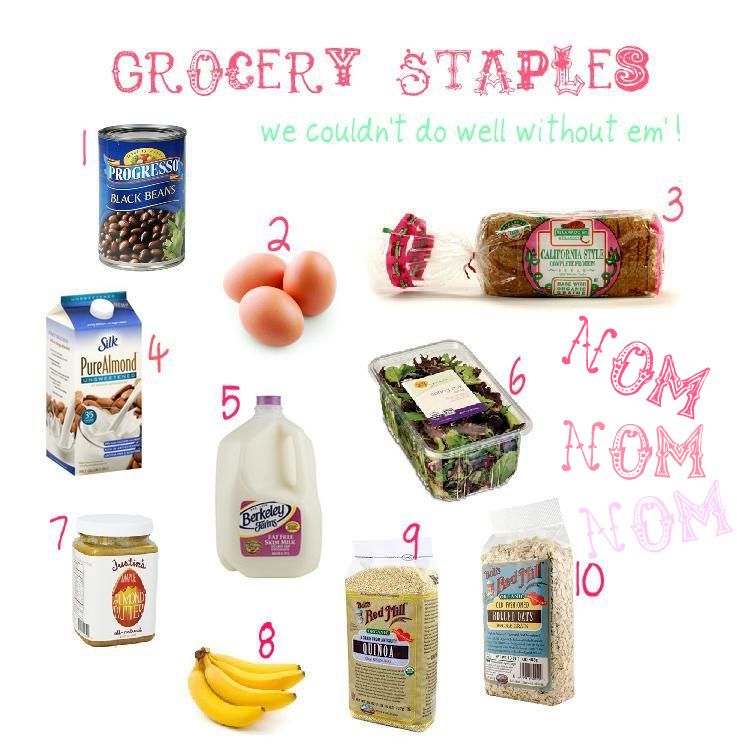
Grocery Staples

Every weekend I spend some time planning the meals my husband and I will share for the next week. This is followed by a grocery list that I will carry with me on Sunday afternoon or Monday morning as I shop for them at our local markets.  Naturally, many items come and go on the list, but there are several that might as well be automatically placed there. Every household has their pantry and refrigerator staples and we are no exception. However, these must-have grocery items are not much different from what was on my pre-wife lists...it's just crazy how much faster they disappear in our house with two bellies consuming them. Henry and I are constantly eating these foods as they are often a part of almost all our meals-- we're pretty healthy eaters so these items are standard. I am SURE, our staples will be changing when babies enter the picture in a few years. Until then, here they are.

1. Black Beans // I add these to salads and mix them into veggie saute's a lot. We like our black beans because they are a good source of lean protein in side dishes.

2. Eggs // I have stopped purchasing eggs by the dozen and now by the case of 24. These are a breakfast staple with our toast or oatmeal in the morning. We also like to have them on hand when they are hard-boiled as snacks or toppings on salads. Since I bake a lot, one may be surprised with how quickly we go through a case of eggs.

3. Alvarado Street Baking Complete Protein Sprouted Grain Bread // This is the only kind of bread we eat 90% of the time. With sprouted grains and tons of protein, this loaf is great for our health and we love the texture and taste.

4. Unsweetened Almond Milk // Henry loves this with his protein shakes in the morning and I like to drink it with my snack or use it to replace milk sometimes.

5. Fat Free Milk // Milk goes in plenty of things in our house! Eggs, baking, oatmeal, protein shakes, coffee...etc, etc. Can't get enough of the moo juice, I guess.

6. Spring Mix // In our house, salads and veggies are constant visitors on our meal plates. I love big salads loaded with fresh greens and I also sometimes blend up green smoothies with this mix.

7. Justin's Maple Almond Butter // This. Stuff. Is. So. Good. Gah! It is very expensive though at about $10.50 a jar! However, we love it so much that we give in about every week and half for it. We eat this on our toast in the morning and Henry is also notorious for his special snack of "Almond Butter Fingers". It doesn't take much to make this snack...all he needs are his fingers and the jar. :)

8. Bananas // Our little family loves bananas...this includes our pups. They are good for you and easy to eat. I like to keep over-ripened bananas available for baking, but it's not often that they stay around long enough to get that ripe before we eat them all.

9. Quinoa // This is our go-to grain! I love replacing rice with quinoa and adding it to salads. We definitely eat a lot of this.

10. Old-Fashioned Oats // Breakfast by default is typically oatmeal. Starting off our morning with a bowl of it definitely gives us a good send-off and keeps us full for awhile.

Monday, January 23, 2012

It's in the Bag

It's been a long and rainy day! Monday night post? Perfectly paired with my Monday market run. Here are the contents of my grocery bags from my shopping trip-- most of these items make regular appearances each week. I consider myself a pretty healthy eater. Some days are better than others...it took work to avoid placing a box of Jo-Jo's and salted caramel chocolate in my cart tonight... :)


1. Sprouted Whole Wheat Bread with Fiber: one of my favorite breads for toast on the way to work and lunchtime sandwiches.
2. Quick Cooking Irish Oatmeal:  Oatmeal saves my life a lot and keeps me going through the day. I like to pack these in plastic baggies, stash them in my work bag, and try to microwave a serving during my recess break or after the end of the day dismissal. I also keep some dried fruit in my desk that I throw on top for a little sweetness.
3. Vanilla Protein Powder: 100 calorie snack packed with 18 grams of protein! Just what I need to push through work and still make it out for a good work out. Also, if I don't have enough protein in my breakfast, I find myself starving by recess-- I like to drink this on the way to school, too.
4. Reduced Sodium Turkey Breast Slices: my bread's best friend for quick sandwiches!
5. Lite Cheddar Slices: These guys like to join the sandwich party.
6. Spring Salad Mix: One package will usually get me through a few days for fresh salads or as a bed for protein such as fish.
7. Broccoli Florets: Another favorite snack-- I like to steam cups of these guys and sprinkle a little salt and a tad of  Parmesan cheese on top.
8. Sliced Crimini Mushrooms: I plan on putting these in quick breakfast scrambles or salads for the week.
9. English Cucumber: This guy serves me as a crunchy snack or addition to sandwiches, salads, etc.
10. Avocados: Nothing to say except for love, love, love.
11. Plain Nonfat Greek Yogurt: Another one of my preferred snacks. With a drizzle of honey, sliced almonds, and a banana, Greek yogurt can make my day.
12. Vanilla Nonfat Greek Yogurt: Same as the plain version, but with a little more sass.
13. Ready Made Salad: my lazy Monday night post-workout dinner.
14. Shelled Edamame: I plan on lightly salting these and seasoning them with some ginger and sesame oil to eat along side some salmon I have in the freezer this week.
15. Bananas: ...um, bananas!
16. Spicy Jalapeño Chicken Sausage: My favorite sausage from Trader Joe's. This is so good and a great hassle free protein when I need it.
17. Blueberries: I pack handfuls of it in containers and snack on these throughout the day at work.

What's in your grocery bag?
Happy Monday!

Tuesday, January 17, 2012

Happy Toscana Tuesday!

I am so excited for tonight's post! Mostly because it reminds me of how excited I was to eat tonight's dinner about one hour ago. Zuppa Toscana is, hands down, one of my absolute favorite soups! I posted a recipe on my blog when I used to be Yumology and you can find it here. I make this so many times that the recipe might as well be engraved into my brain. However, because I happen to love kale so much, I typically add extra. Also, today I used a Italian turkey sausage and homemade chicken broth made from last week's roast chicken carcass (Martha would be proud).


My apologies for the poor photo-- you do what you can when you're out of natural light and only have your iPhone on hand! :)

I hope, if you haven't made this already, enjoy this soup as much as I do. Happy Toscana Tuesday!

Tuesday, October 18, 2011

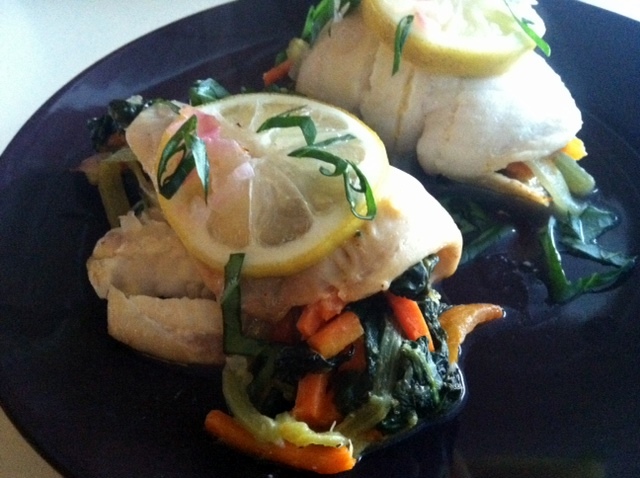
Spinach Stuffed Citrus-Tilapia

Greetings! Here's a simple and healthy recipe for a busy Tuesday night. 

Keeping it short and sweet so I can get back to reading 5th grade research papers. ;) 


Spinach Stuffed Citrus-Tilapia
serves 4
inspired by this Whole Foods recipe

3 tbsp olive oil (divided use)
4 Tilapia fillets
2 1/2 cups fresh baby spinach
1 cup carrots, julienned
1 cup celery, julienned
1/4 cup finely diced scallions
1 navel orange (juice and zest)
1 medium lemon (to be cut into thin slices)
salt and pepper
1/4 tsp ground ginger
1/4 tsp ground nutmeg
fresh basil, for garnish
4 pieces of foil about 14' x 6' in size (for wrapping the fish)

Preheat the oven to 450 degrees F.

1. Heat the olive oil in a large sauté pan on a medium flame. Once heated, add about half of the scallions, carrots, and celery. Season lightly with salt and pepper. Add the spinach and continue to cook for about 5-6 minutes or until carrots are slightly tender and the spinach has wilted down. Add the nutmeg and ginger before stirring and cooking for an additional minute. Turn off the heat and add the zest and juice of the entire orange then stir well to combine. Season with salt and pepper to taste.

2. Place each fillet of tilapia near the center of each piece of foil. Lightly season each side with salt, pepper, and the remaining oil. Next, take a portion of the spinach mixture and spoon it gently onto the middle of each fillet. Gently roll the fish over while keeping the spinach stuffing inside; keep stuffed fillets on their seam sides down. Lightly season with a little more salt and pepper, place a slice of lemon over each piece, and divide the remaining scallions for each portion and add them on top. Loosely wrap the fish in the foil by creating an envelope and gently sealing the edges by folding them shut (keep the lemon side of the fish up). Allow the wrapped fish to sit on a baking sheet and bake for 15-17 minutes. Carefully remove each package and use a spatula to plate the fish. Garnish with chopped basil and enjoy! :)

Monday, September 12, 2011

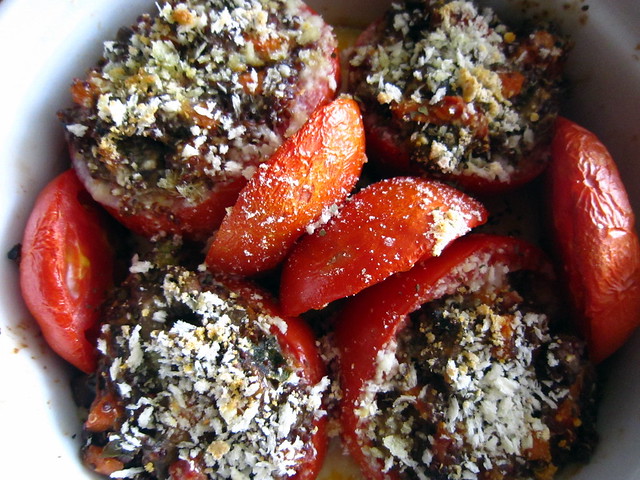
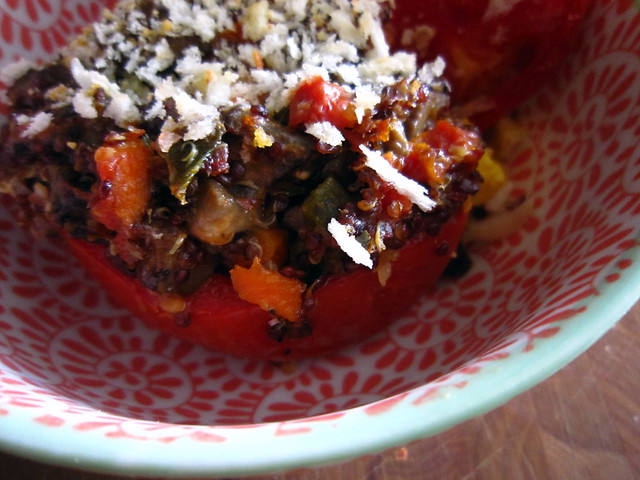
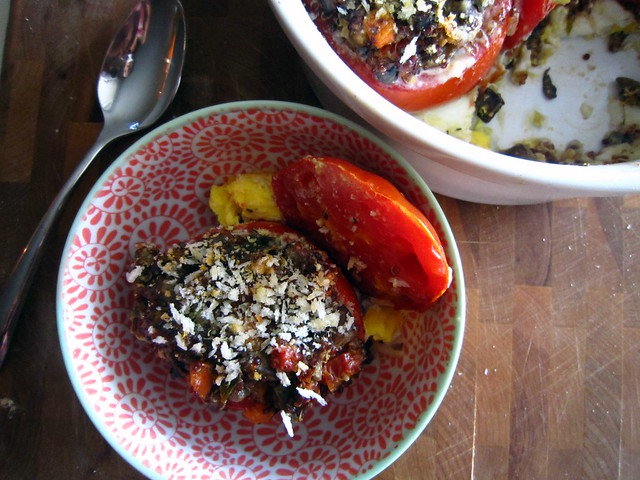
Quinoa and Vegetable Stuffed Roasted Tomatoes

Tomatoes??

Ta-may-taaaahs!

This piece-of-cake vegetarian dinner has the ability to make you excited (or even more enthusiastic) about tomatoes. Packed with oh-so-good for you veggies and protein packed, wonder-of-a-grain, quinoa (and extra baked eggs on the side, if you'd like)...mama would be proud!


What's the best part for me (besides my tummy's gratitude, that is)? This was a total refrigerator and pantry-raid meal--brilliant meals come from frantic minds and hungry bellies!

Quinoa and Vegetable Stuffed Roasted Tomatoes
serves 4

3 1/2 tsp olive oil, divided use
4 medium-large tomatoes
1/3 cup dry red quinoa
2/3 cup water
1/2 cup diced carrots (about 2 small-medium carrots)
1/3 cup chopped green onions
2 garlic cloves, minced
1 1/4 cup diced portabella mushrooms
1/4 cup sun-dried tomatoes (I prefer the kind in jars packed with olive oil), finely chopped
2 1/2 tsp salt, divided use
3/4 tsp pepper, divided use
1/4 tsp ground cumin
1/2 tsp dried oregano
1/2 tsp dried basil
3/4 cup grated parmigiano-reggiano  cheese, divided use
1/4 cup triple cream or brie cheese (without the rind)
1/4 cup panko bread crumbs

*for additional baked eggs you will need 4 large eggs.

Preheat the oven to 350 degrees F.

1. Cut about one inch of the tops off of each tomato. Carefully use a spoon and/or a knife to remove "insides" of each tomato; make sure to be careful and not cut through the body. Set aside the removed tomato bits and place the empty cavities into a small, yet deep, baking dish coated with 1 tbsp of olive oil.

2. In a small-medium saucepot, combine the dry red quinoa, water, and 1/2 tsp salt. Stir and bring to a boil; reduce to a simmer, cover, and allow quinoa to cook for about 10-15 minutes. Quinoa is cooked when grain begins to turn translucent, the spiral-like germ has begun to separate, and almost all of the water has been absorbed.

3. While the quinoa is cooking, heat 1 1/2 tsp of olive oil in a saute pan. Add the carrots green onion, and garlic--season with a pinch of salt and stir to cook; saute for about 3 mninutes on medium heat. Add the mushrooms, sun-dried tomatoes, and continue to stir and cook for an additional 4-5 minutes. When the quinoa is cooked, add it into the vegetable mixture and stir to combine. Add the remaining salt, pepper, cumino, oregano, basil, 1/4 cup of grated parmesano-reggiano cheese, and triple cream (or brie) cheese. Take half of the removed tomato parts (do not add the juice), coarsely chop it up, and add it to the pan. Continue to stir and cook for another 2-3 minutes on low-- cheese should be melted and well combined into the mixture.

4. Sprinkle  1/4 cup of the grated parmgiano-reggiano cheese into each tomato; divide 1 tsp of salt and 1/4 tsp of pepper into and on the exterior of each of the tomatoes for extra seasoning. Gently scoop and pat down even amounts of the vegetable filling into each empty tomato until all of it has been used. Evenly sprinkle the panko bread crumbs and the remaining 1/4 cup of grated parmigiano-reggiano cheese atop the tomatoes. Take the tomato caps and gently squeeze them in between the tomatos where some room exists. Drizzle the remaining 1 tbsp of olive oil across the tomatoes and roast them for about 40-45 minutes on the middle rack. *optional: crack each of the eggs into empty spaces in the baking dish after 20 minutes of cooking time.* Panko and cheese crust should be golden brown.

Tuesday, August 23, 2011

Tuesday Night Dinna'!

  • In my personal opinion, Cooking Light is a wonderful resource for delicious and healthy recipes. I often browse through their site and become inspired by some of their cookbooks that I own. This chicken recipe is a yum-dum-diggity variation of Cooking Light's Crunchy Shrimp with Toasted Couscous and Orange Ginger Sauce. If you're looking for an easy recipe that allows you to work with a variety of protein options, I highly recommend this one. Although it calls for shrimp, I have found that chicken and fish are also great friends. However, if you do decide to use fish, I suggest opting out of cutting your fillets into pieces and either pan-searing or roasting them. 
Now, enough reading--more eating!


  • Crunchy Chicken with Toasted Whole-Wheat Couscous and Orange Ginger Sauce
  • *adapted from here 
  • serves 4

  • Sauce:
  • 1 cup orange juice
  • 1 tablespoon chopped fresh cilantro
  • 2 tablespoons reduced-fat mayonnaise
  • 1 1/2 tablespoons fat-free, less-sodium chicken broth
  • 1 teaspoon grated peeled fresh ginger
  • 1 teaspoon fresh lime juice
  • 1/2 teaspoon ground cumin
  • 1/4 teaspoon salt
  • 1/4 teaspoon ground red pepper
  • Couscous:
  • 1 cup uncooked couscous
  • 1 1/2 cups fat-free, less-sodium chicken broth
  • 1/2 cup orange juice
  • 1/2 teaspoon salt
  • 1/3 cup chopped green onions
  • 2 tablespoons sliced almonds, toasted
  • 1 tablespoon unsalted butter
  • Chicken:
  • 3/4 - 1 lb uncooked chicken breast, cut into bite-size chunks
  • large egg white, lightly beaten
  • 1/2 cup panko (Japanese breadcrumbs)
  • 1 teaspoon chopped fresh cilantro
  • 1/2 teaspoon grated peeled fresh ginger
  • 1/8 teaspoon freshly ground black pepper
  • 1 tablespoon canola oil

  • 1. To prepare sauce, bring 1 cup orange juice to a boil in a small saucepan over medium-high heat; cook until reduced to 1/4 cup (about 10 minutes). Remove from heat; cool completely. Stir in 1 tablespoon cilantro and next 7 ingredients (through red pepper); set aside.
  • 2. To prepare couscous, place couscous in a large nonstick skillet over medium-high heat; cook 3 minutes or until toasted, stirring constantly. Add 1 1/2 cups broth, 1/2 cup orange juice, and 1/2 teaspoon salt; bring to a boil. Remove from heat; cover and let stand 5 minutes. Fluff with a fork; add onions, almonds, and butter, stirring until butter melts. Keep warm.
  • 3. To prepare chicken, combine chicken and egg white in a large bowl, tossing to coat. Combine the panko, 1 teaspoon cilantro, 1/2 teaspoon ginger, and black pepper in a large zip-top plastic bag. Add shrimp to the bag, and seal and shake to coat.
  • 4. Heat oil in a large nonstick skillet over medium-high heat; arrange shrimp in a single layer in pan. Cook 2 minutes on each side or until done.
  • 5. Place 3/4 cup couscous on each of 4 plates; top each with a portion of chicken. Drizzle each with 1 1/2 tablespoons sauce. Garnish with extra almonds and cilantro, if desired.

Saturday, August 20, 2011

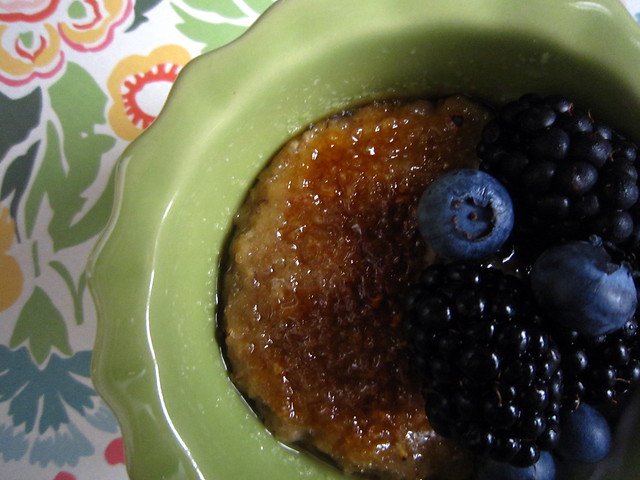
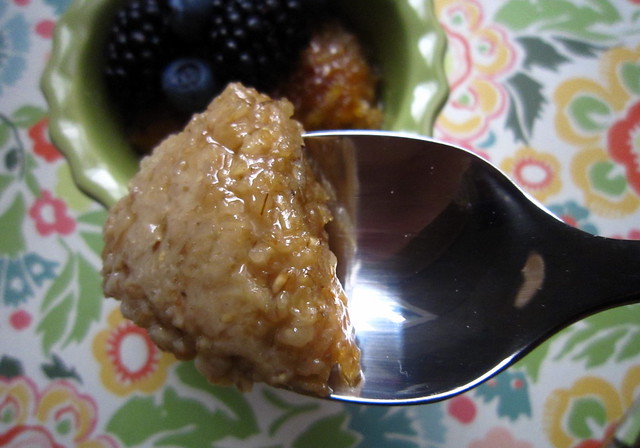
Brûléed Steel Cut Oatmeal

Oatmeal is my life saver. It's my one of my favorite breakfast items when I want something satisfying yet healthy. Eating it in the morning keeps me full and ready for my day. I love inviting brown sugar, dried fruit, nuts, and other yummy friends to the party-- mix and mingle them together and I'm usually good to go. 

Today I opted for something a little more special and whipped out my torch for an "Oatmeal alla Amelie" breakfast. However, I have to admit that my bruleed oatmeal was so perfectly sweet and delicious, I almost felt like I was eating dessert. Dessert for breakfast? And, it's good for you??

At this point, it's okay if you're squealing with joy. I promise. I'm still squealing.


Brûléed Steel Cut Oatmeal
serves 4
*Steel cut oats are heartier and nuttier. Regular oats just won't hold up with this recipe. I use a quick cooking steel cut oatmeal here-- takes much less time to cook than the regular kind (which is about 30 minutes). Either kind of steel cut oats will do.


1 1/2 cups of water
1 1/2 cups of fat free milk
1/4 tsp of salt
1 cup of quick cooking steel cut oats (I use one from Trader Joe's)
2 tsp real vanilla extract
3 1/2 tbsp dark brown sugar
Turbinado sugar


1. Combine the water, fat free milk, and salt in a large pot and bring to a boil. Add the steel cut oats, stir, and reduce the heat to medium-low. Allow the oats to cook for 5-7 minutes, stirring regularly. Oats should become very thick and creamy. During the last minute of cooking time, stir in the vanilla extract and dark brown sugar. Turn off the heat and portion the oatmeal out into ramekins. Allow to cool for about 1 minute.


2. Sprinkle the tops of the ramekins with Turbinado sugar-- be sure to make as much of an even layer as possible. Do not skimp on the sugar; if you don't sprinkle enough, it will be difficult to get a good "brûléed" crust.  An amount between 1/2-1 tbsp of sugar shall do, depending on the size of the ramekin. Use a kitchen torch to melt and caramelize the sugar until  a crispy-golden brown crust is formed.

Tuesday, July 19, 2011

Summer Salad with Honey-Orange Vinaigrette

Oh, sweet summer! How I love you so.

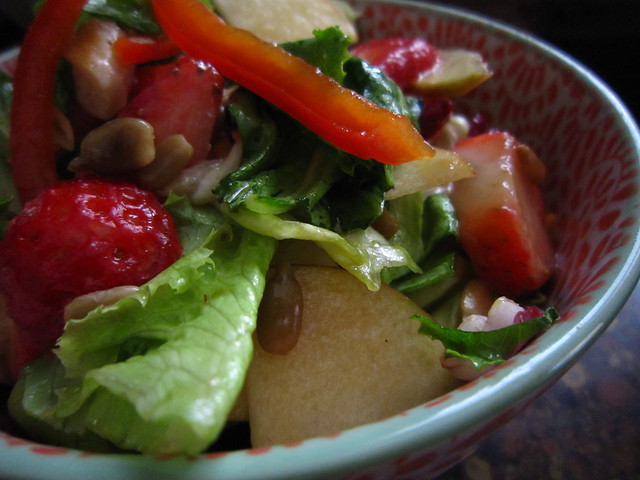
This fresh salad with berries, tender butter lettuce, and toasted sunflower seeds reminded me of the season as soon as I took my first bite. It's super simple, but super yum.

I added some organic chicken that was lightly seared, but you could choose to add fish for another lighter protein option or opt out of meat completely.

Lovely. A delicious salad that's easy to make and gives you options. Just, lovely.


Summer Salad
serves 3-4


1-2 heads of butter lettuce, washed and chopped
3/4 cup radicchio, washed and chopped
1 medium red bell pepper, seeded and thinly sliced
1/4 cup carrots, thinly sliced or shredded
2 cups strawberries, trimmed and sliced
1 medium Fuji apple, cored and thinly sliced (I cut the slices in half, too)
1/4 cup toasted sunflower seeds, shelled


1. In a large bowl, combine all the ingredients and toss well to distribute everything evenly. Dress with honey-orange vinaigrette (recipe as follows). 


Honey-Orange Vinaigrette
makes about 1/2 cup


1/3 cup extra virgin olive oil
1/4 cup orange vinegar (or any fruity vinegar)
2 tbsp honey
1/2 tsp salt
1/4 tsp pepper


1. Whisk all the ingredients together in a bowl until well combined. Use some or all on the salad. This dressing can be stored in an air-tight container for about a week in the refrigerator. 

Monday, July 11, 2011

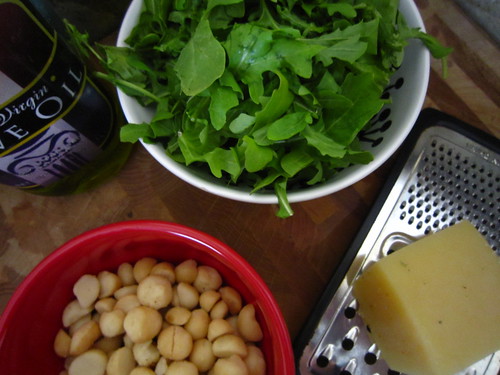
Arugula-Macadamia Nut Pesto


The slightly bitter and peppery taste of arugula is one that not all people enjoy. I, however, love the flavor and it is often my green of choice in salads and sandwhiches. Arugula pesto isn't a breakthrough in the pesto family, but it also isn't a common one I see a lot.

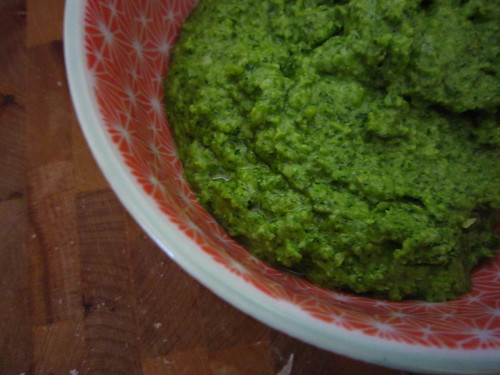
This arugula pesto has a moderately sharp bite with buttery notes and a fruity finish. The macadamia nuts play add a subtle richness alongside the freshness of extra virgin olive oil, parmesan cheese, and light zings of lemon.

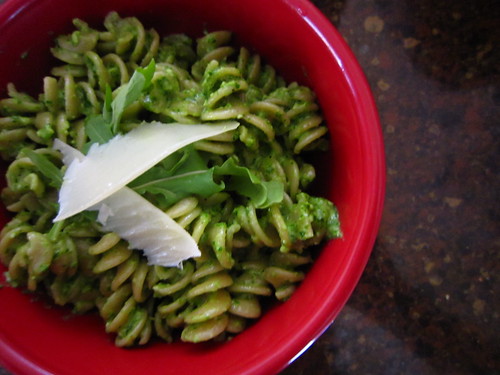
Enjoy this as a spread on bruschetta or as a pasta sauce-- just as I did for lunch today on top of whole-wheat rotini noodles. I also had a dollop on top of my soft scrambled eggs this morning for breakfast. Two servings of arugula pesto in one day? A great way of getting in the greens.

Arugula-Macadamia Pesto


*makes about 1 1/2 cups of pesto


3 1/2 cups of packed arugula leaves (washed and dried)
1/4 cup dry-roasted macadamia nuts 
1/4 cup freshly grated parmesan cheese
juice of half a lemon (about 2 tbsp)
1 tsp salt
1/2 tsp pepper
1/4 tsp ground nutmeg
1/3-1/2 cup extra virgin olive oil


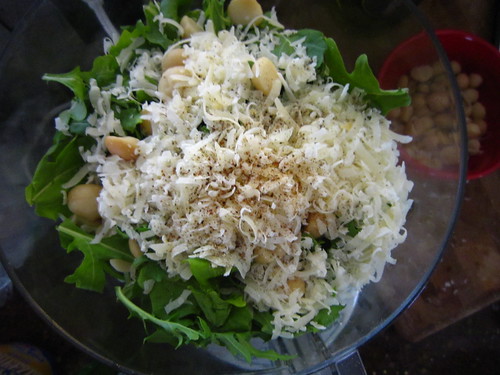
1. Place all ingredients, except for the olive oil, into a food processor. Pulse the mixture a few times to break up the arugula and combine the ingredients. With the processor running, drizzle in the extra virgin olive oil until a desired consistency is reached. Season with additional salt and pepper  to taste, if needed.


2. This will keep in the fridge for 2-3 days. Store in an air-tight container and drizzle more olive oil on top before sealing the container. 

Thursday, March 24, 2011

Low-Fat Cream of Broccoli Soup

Goodness! The weather is atrocious! A rain storm has been playing the role of the uninvited guest in Northern California and will continue to do so for a few more days. It's been awful driving on the streets and worse on the freeways. Running errands around town became much more difficult; I trekked around town getting wet and feeling very cold. As soon as I returned home, I changed out of my wet jeans and gleefully jumped into cozy sweats.

It's no surprise that when the weather is unpleasantly cold and stormy, I get a big hankering for big warm bowls of comforting soup and alongside wholesome and crusty bread. I should have expected that I'd cook up a large pot for dinner--with plenty for leftovers!

This super flavorful creamy broccoli soup not only satisfied my cold-weather cravings, but it made me think twice about how little fat was in it. The body of the soup was quite rich and very creamy. Unlike most creamy soups, however, I didn't use any heavy cream or a great deal of butter. Instead, the addition of a few Yukon Gold potatoes and fat-free milk did the trick.

Another healthy and yummy success in my book! :)

Low-Fat Cream of Broccoli Soup

makes about 6 cups

4 tbsp. unsalted butter

1 1/2 cups celery, coarsely chopped

1 cup white onion, coarsely chopped

3 small Yukon gold potatoes, diced

7 cups trimmed broccoli florets, coarsely chopped

1/4 cup all-purpose flour

4 cups low-sodium vegetable stock

3/4 cup fat-free milk

1/3 cup freshly grated parmesan cheese

salt and pepper

1. In a large pot, melt the butter over medium heat. Add the celery and onions, season lightly with salt and pepper, and cook  for about 3 minutes, stirring occasionally, just until they are slightly tender. Add the potatoes, and cook for another 3-4 minutes, stirring often to avoid browning (reduce the heat if necessary). Add the broccoli, lightly season with salt and pepper, stir, and cook the mixture for 5 minutes. Add the flour and mix it in with the vegetables. Continue to cook for an extra 2 minutes.

2. Add the vegetable broth into the pot, increase the heat to high, and bring the soup to a boil. Cover the pot, reduce the heat to a medium simmer, and allow the soup to cook for about 20-25 minutes or until the broccoli is very tender. Turn off the heat and carefully pour the soup into a food processor and process until smooth (do this in batches if you need to). Pour the soup back into the pot and turn the heat back on medium. Stir in the milk, parmesan cheese, and about 3/4 tsp of salt and 1/2 tsp of pepper (you can always change the amount of salt and pepper to taste). Allow the soup to lightly simmer for another 4-5 minutes. Serve and garnish with bread and/or extra parmesan or cheese of choice, if desired.