Monday, February 25, 2013

Grocery Staples

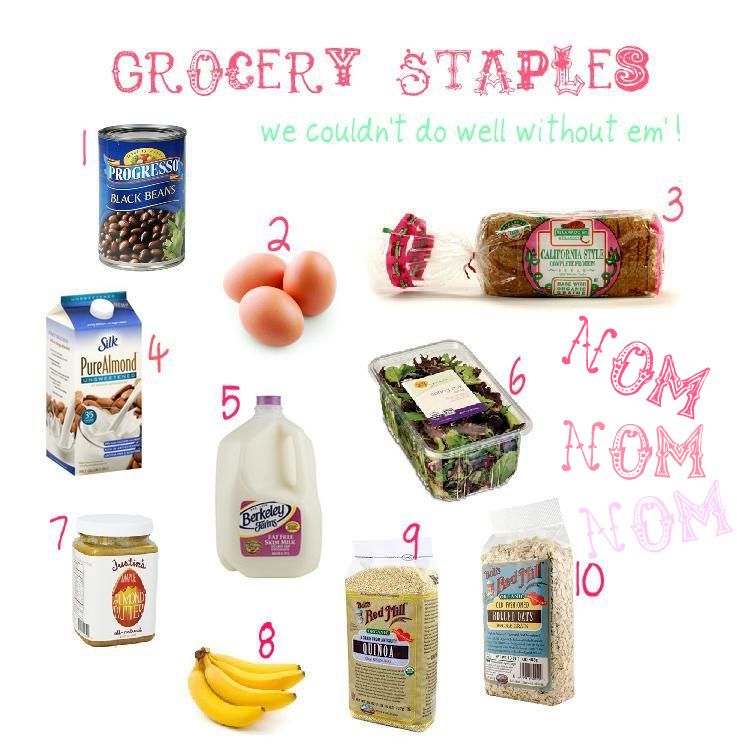
Every weekend I spend some time planning the meals my husband and I will share for the next week. This is followed by a grocery list that I will carry with me on Sunday afternoon or Monday morning as I shop for them at our local markets.  Naturally, many items come and go on the list, but there are several that might as well be automatically placed there. Every household has their pantry and refrigerator staples and we are no exception. However, these must-have grocery items are not much different from what was on my pre-wife lists...it's just crazy how much faster they disappear in our house with two bellies consuming them. Henry and I are constantly eating these foods as they are often a part of almost all our meals-- we're pretty healthy eaters so these items are standard. I am SURE, our staples will be changing when babies enter the picture in a few years. Until then, here they are.

1. Black Beans // I add these to salads and mix them into veggie saute's a lot. We like our black beans because they are a good source of lean protein in side dishes.

2. Eggs // I have stopped purchasing eggs by the dozen and now by the case of 24. These are a breakfast staple with our toast or oatmeal in the morning. We also like to have them on hand when they are hard-boiled as snacks or toppings on salads. Since I bake a lot, one may be surprised with how quickly we go through a case of eggs.

3. Alvarado Street Baking Complete Protein Sprouted Grain Bread // This is the only kind of bread we eat 90% of the time. With sprouted grains and tons of protein, this loaf is great for our health and we love the texture and taste.

4. Unsweetened Almond Milk // Henry loves this with his protein shakes in the morning and I like to drink it with my snack or use it to replace milk sometimes.

5. Fat Free Milk // Milk goes in plenty of things in our house! Eggs, baking, oatmeal, protein shakes, coffee...etc, etc. Can't get enough of the moo juice, I guess.

6. Spring Mix // In our house, salads and veggies are constant visitors on our meal plates. I love big salads loaded with fresh greens and I also sometimes blend up green smoothies with this mix.

7. Justin's Maple Almond Butter // This. Stuff. Is. So. Good. Gah! It is very expensive though at about $10.50 a jar! However, we love it so much that we give in about every week and half for it. We eat this on our toast in the morning and Henry is also notorious for his special snack of "Almond Butter Fingers". It doesn't take much to make this snack...all he needs are his fingers and the jar. :)

8. Bananas // Our little family loves bananas...this includes our pups. They are good for you and easy to eat. I like to keep over-ripened bananas available for baking, but it's not often that they stay around long enough to get that ripe before we eat them all.

9. Quinoa // This is our go-to grain! I love replacing rice with quinoa and adding it to salads. We definitely eat a lot of this.

10. Old-Fashioned Oats // Breakfast by default is typically oatmeal. Starting off our morning with a bowl of it definitely gives us a good send-off and keeps us full for awhile.

Sunday, February 24, 2013

Wear What You Drink

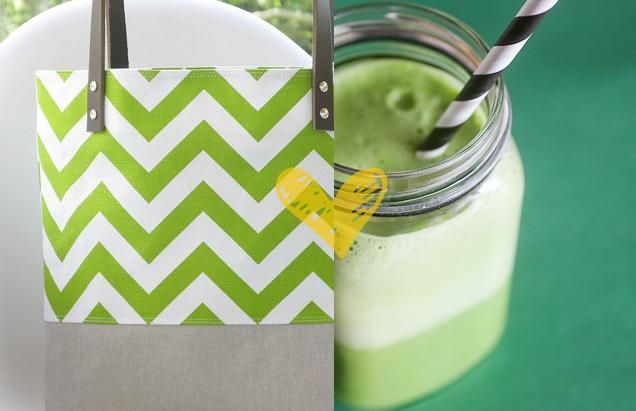
Green, green, green.


Wear this practical and stylish green Chevron Tote, from Jacolily Design, made of canvas with leather straps-- great for running errands or as an easy grab-and-go day bag. Drink this refreshing and healthy Creamy Green Smoothie, from Damaris of Kitchen Corners, made with fresh spinach, coconut water, and lemon grass tea.


Friday, February 22, 2013

Apricot & Passion Fruit Macarons


 Macarons often make appearances in my kitchen. I thoroughly enjoy baking all sorts of things, but there's a small list of desserts that truly bring me great satisfaction upon completion of making them and macarons are definitely on that list. Perhaps it's the fact that to make them is like an art and science. Before I hand a pretty firm grip on making them well, I had my fair share of heartbreak and headaches over broken, mishaped, dull, and ugly shells. Oh, and shells without feet! Those were the worst of macaron memories. However, now, when a tray full of perfect macaron shells, come out of my oven, I am overcome with joy. And, let's be honest, a great deal of relief, too.

These macarons, with a pleasant buttercup yellow hue, take me back to Maui, Hawaii-- where my Henry and I traveled to for our honeymoon. These little charmers are filled with a sweet yet tart apricot and passion fruit filling. The tropical notes of passion fruit take me back the island and make me miss the delicious shaved ice I ate so much of! My mouth hasn't tasted such tropical flavors since our trip--until I bit into one of these macarons last night. Then another this morning. Okay, maybe two macarons this morning. Oops.

Apricot & Passion Fruit Macarons
100 g aged egg whites (aged= resting in an air-tight container in the fridge for 3-5 days)
1 tsp cream of tartar
28 g white granulated sugar
125 g finely ground almond meal (Bob's Red Mill makes a great one)
200 g powdered sugar*
1 tsp real vanilla extract
1 tsp mango extract (you can find these in specialty baking stores; it is not necessary, but I found that the subtle addition allowed the passion fruit flavor to come out more.)
optional: buttercup yellow food gel coloring (do not use liquid food coloring)


Prepare two baking sheets lined with silicone mats (or parchment paper if you don't have these).

1. Combine and whisk together the almond meal and powdered sugar. Set aside.

2. Using a stand mixer with a whisk attachment, beat the egg whites on a low speed with the cream of tartar until the mixture becomes foamy (kind of like a bubble bath). At this point, slowly pour in the white granulated sugar as the mixer is running. Add the vanilla and mango extract and increase the speed to medium; continue to beat the mixture until a smooth glossy meringue with soft peaks has formed (kind of like shaving cream). Be careful to NOT over beat and dry out your egg whites. If you are coloring your macarons, add a few drops of the gel coloring a little bit before your egg whites have reached their soft and glossy peaks.

3. Remove the bowl from your stand mixer and add 1/3 of the almond meal and powdered sugar mixture. Gently fold together just until everything is combined. Repeat with the next 1/3 of the dry ingredients and again with the final 1/3.

4. Prepare a pastry bag with a medium round tip (about 1 cm) and transfer the macaron batter into it. Pipe small circles onto the prepared baking sheets to make neat rows. Be sure to leave about 1 1/2 inches between each macaron. Grab the ends of the baking sheet and, while holding it level, firmly tap it on the counter a few times to get rid of any air bubbles. Allow the macarons to rest on the counter for 30-60 minutes before baking.

5. Preheat the oven to 295 degrees F and make sure the racks are in the middle portion. Bake the macarons for 15-20 minutes, one sheet at a time. Do not open the oven door at all! Once they are finished, allow them to cool for a few minutes; Gently peel away the silicone mat while lightly pushing the macaron cookies off. Repeat with the remaining trays of macarons.*Note: Baking times may vary depending on your oven and the temperature/humidity in the room. These are very temperamental; I suggest testing a small batch to find your ideal baking time with your oven.

6. Once cooled, fill the macarons with the apricot and passion fruit filling (recipe below). Pipe a small dollop onto the back side of one macaron shell and sandwiching it together with another. Repeat with the rest of the macarons. If not consuming right away, store them in an airtight container and keep them in the fridge.


Filling
1/2 cup dried apricot paste (place dried apricots into a food processor until they become a thick paste)
3/4 cup passion fruit curd (recipe from Martha Stewart here)

1. In a small bowl, use a whisk to mix together the dried apricot paste and cooled passion fruit curd. The filling should be thick and not runny. If you're not using this right away, store it in an airtight container and keep it in the refrigerator.


Thursday, February 21, 2013

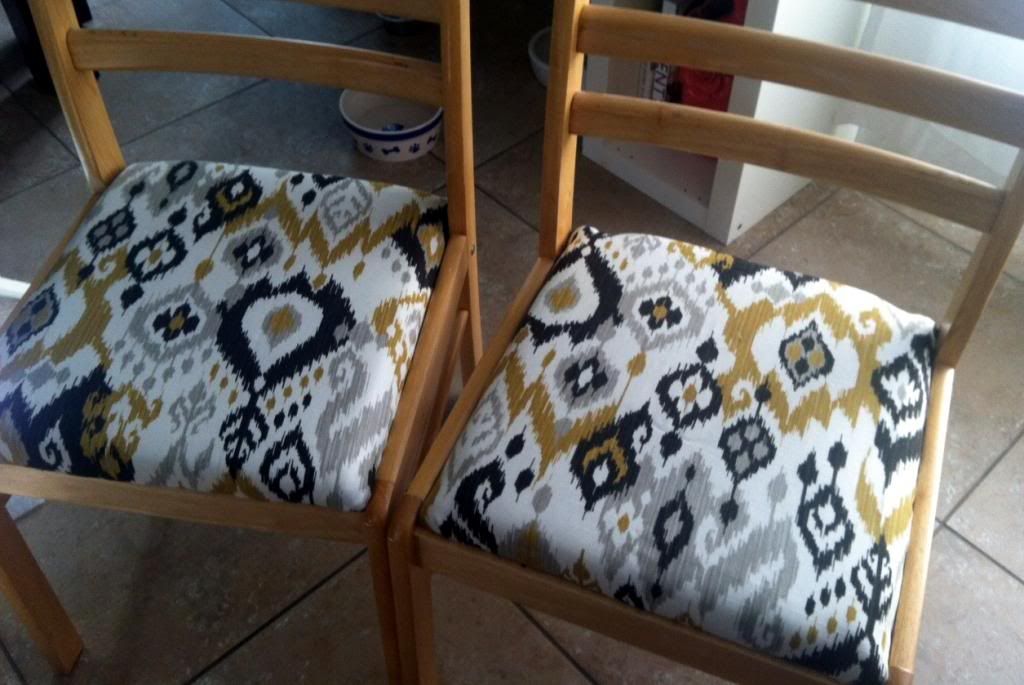
Reincarnate: Ikat Chairs


Eeeeeeeee. That's the sound of  joy coming from wee little angels in chair heaven.  They love when the old chairs get a new life. No chair in good condition with a lot of potential deserves to be left unwanted and undesired.

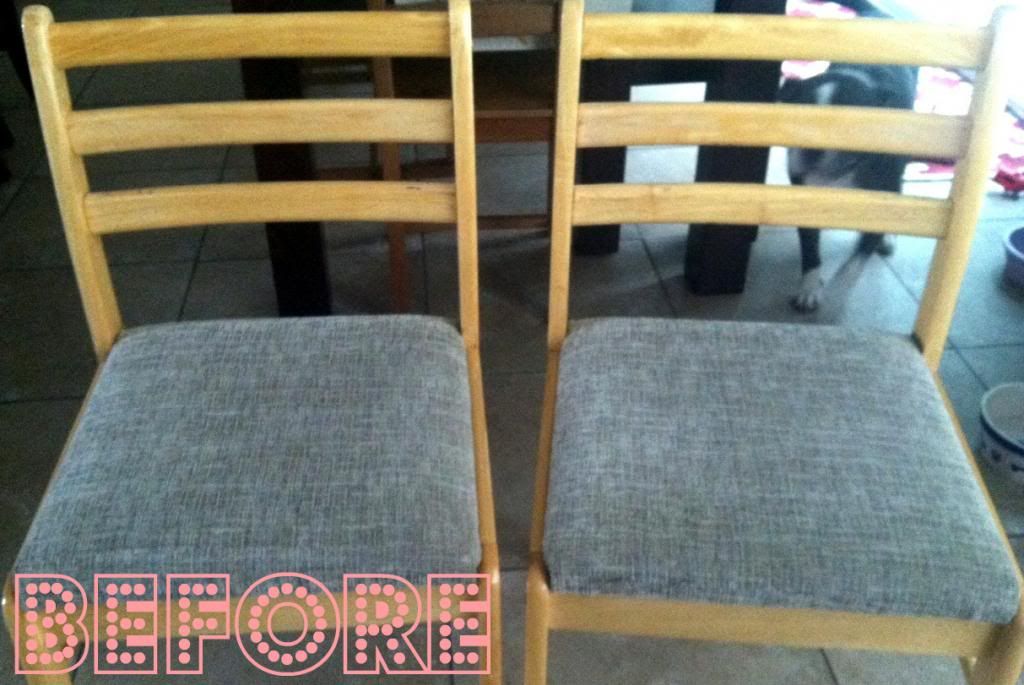
A good friend of mine and I went thrift store hopping about a month ago. I wanted to find some charming little vintage tea cups and plates to decorate with. Although I didn't have much luck, I was ecstatic when I found this pair of chairs. Each of them cost $10 and they were in pretty great shape. They didn't look too appealing-- not going to lie. They actually reminded me very much of the chairs I spent many hours sitting in as I crammed for college exams in my dorm room (yuck!). I knew with a little paint, great fabric, and a bit of elbow grease I could spruce them up.

Here's how I did it (apologies for the lack of photos as I went through the process):
 1. I unscrewed the chair seat from both of the frames and then removed the old fabric. As I was doing this, I was surprised to find out that the unattractive grey material was actually covering another a cushion covered in yet, another, awful material. This hidden cushion, with it's own wooden bottom, was upholstered on top of the chairs actual wooden bottom. Uh...did you get that? Basically, the seat cushion had a seat cushion inside of it. So, I ditched the extra one and didn't even bother removing the fabric from it.


2. Next, I cut a piece of 2" thick high-density chair foam replacement to fit the size of the wooden seat. I used spray adhesive to secure it on top before covering the foam with polyester batting. I placed the wooden seat, with the attached foam, on top of the batting and cut the appropriate amount, after leaving about a 1 1/2 inch of extra batting around all sides of the seat. I then used a staple gun to wrap the sides of the seat with the excess batting around the perimeter. I pulled it taut, but not enough to create a lot of tension.

3. Once I finished with the batting, I placed my seat, foam and batting side down, on to the back side of my new ikat fabric (purchased at Joann's from the upholstery section). This way, I could complete the re-upholstery without having to flip the fabric upside down again. Like the batting, before cutting the material, I left about a 1 1/2" border of extra fabric around the perimeter. I then used my staple gun to attach the new fabric. *Notes: I made sure to check and see if the fabric was aligned correctly on the seat before stapling. Also, I found that stapling that stapling the fabric to the middle of each side helped keep it in the right place before I finished the entire seat. Sorry I don't have pictures of this step-- I got a little preoccupied. However, this is a great tutorial from Southern Hospitality Blog that helped me with this part.
I placed my new cushions onto the old frames just to see how they'd look (unscrewed still)-- much better already!
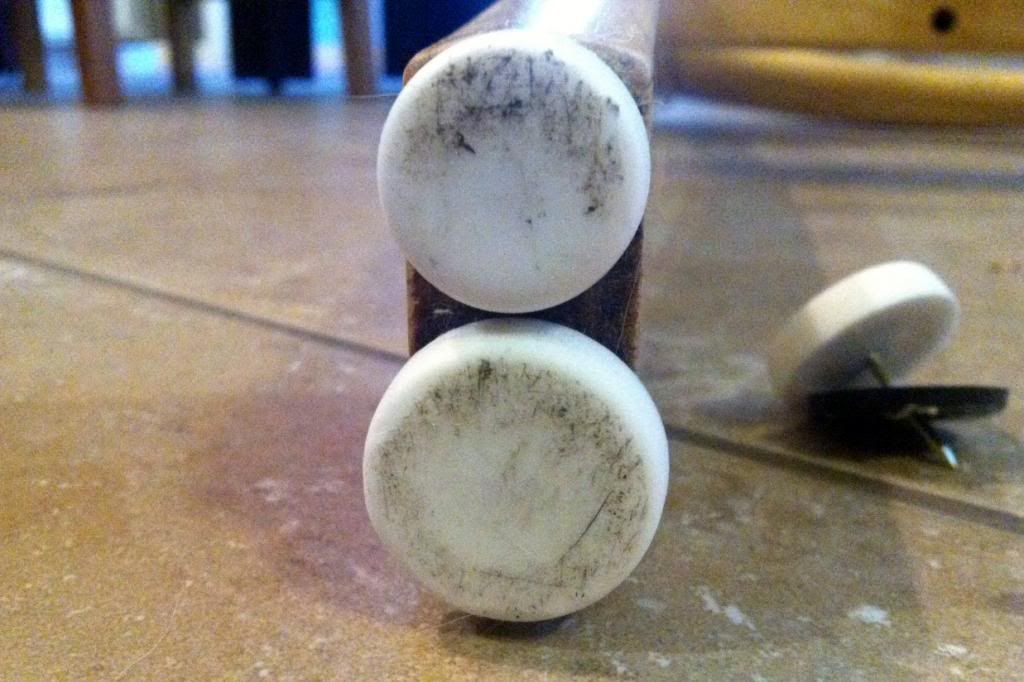
4. Now that the seat cushions were done, it was on to the chair frames. Before I did any sanding to prepare for painting, I took a flat headed screw driver to pry off the nasty floor protectors that had been placed on each of the leg bottoms. They were not the right shape and they had all kinds of grime and gunk...ew.

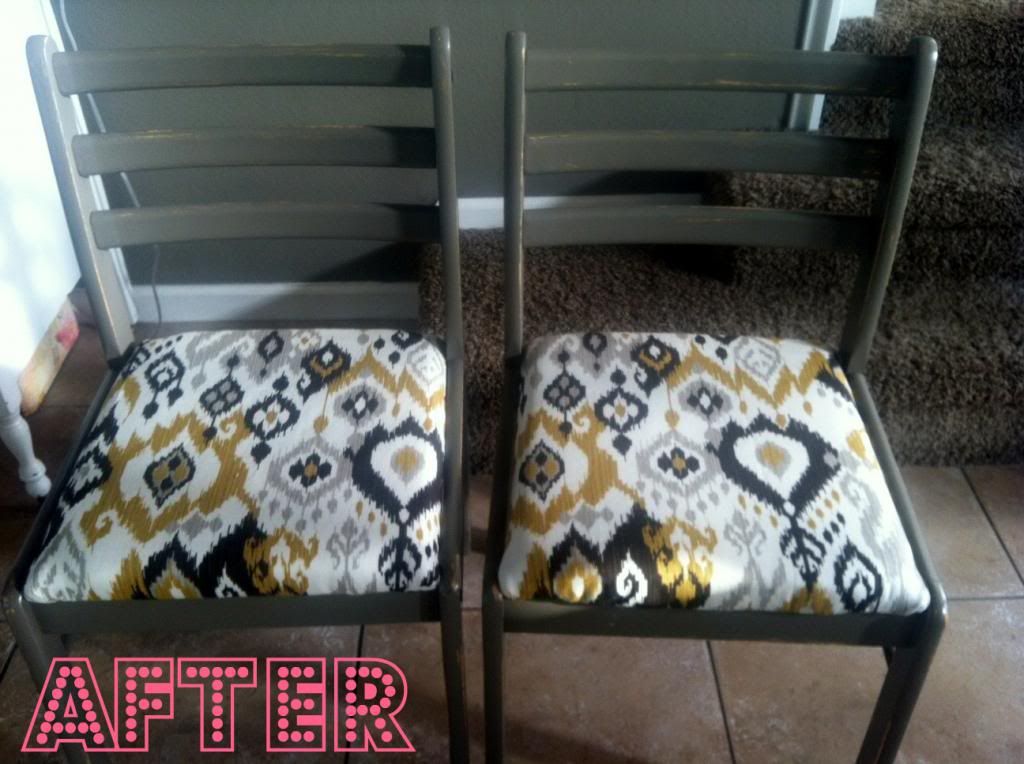
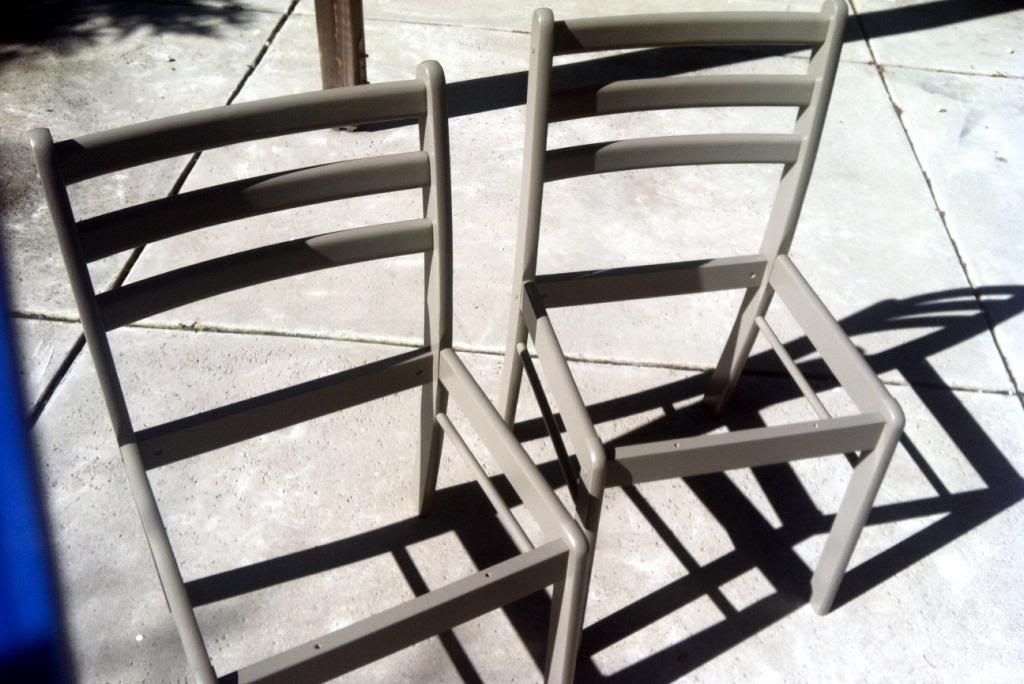
5. I then used medium grit sandpaper to strip off the old sealer on the chairs. To me, this was super tedious and I will admit that I became a little lazy with it. However, I got through it and sanded down almost all parts of the surfaces. Next, I used a damp cloth (with water) to clean the frame. I wanted to make sure I didn't have any dust or sanded bits present when I painted. After allowing both chairs to dry, I painted an oil-based primer onto the chair frames and waited for them to dry. I actually just left them in the garage and continued to work on painting the next day. This is when I applied my grey paint. The color I used was "Brook Trout" from the Martha Stewart Collection-- it's a warmer grey and I thought it went well with the colors in the ikat fabric I selected. I painted on two coats (allowing the first to dry completely before moving on to the second) using a mini roller and a small brush (to get all the little corners and hard-to-get areas). Once the painting was done, I left them out in the garage overnight to dry while I carried on with my day.

6. Paint is dry! Woohoo! I carried my chair frames out to the backyard for the finishing touches. The nice grey coating was a huge positive change to the old oak finish, but I thought that it looked too unaturally pristine for the simple shape of the chair frames. 
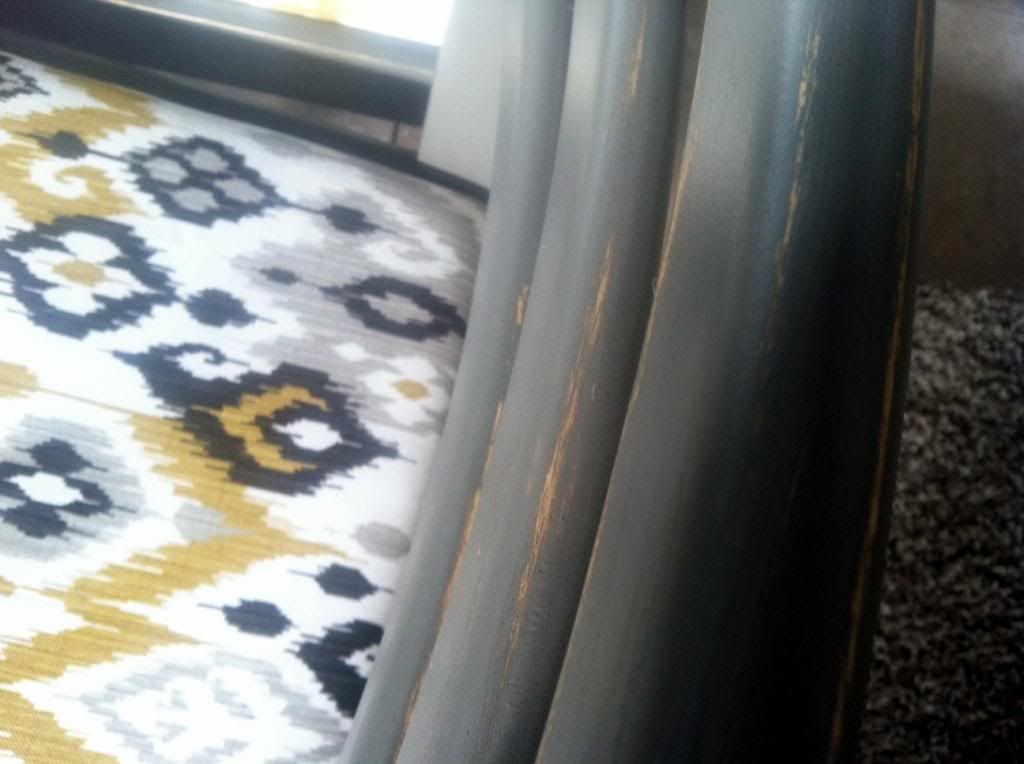
To add some extra depth and personality, I helped speed up the "lived-in & vintage" look of the frames by using fine grit sandpaper to strip some of the edges and surfaces of the chairs. When I first took the sandpaper to the back of the chair, I was tempted to shriek as the new beautiful paint became scuffed and scratched! It was hard to remember that I wanted my chairs to look imperfect after working so hard on them. However, after sanding down more sides and edges, I was completely satisfied with my decision to keep the look a little more flawed. :)  It definitely gave it a "shabby-chic" appearance. I actually liked seeing some of the old oak peek through the grey paint. 

7. We're in the home stretch! The last step for the frames was applying sealer. I didn't want the paint to come off or get scuffed more. That would have been a likely outcome since I did take sandpaper to it and I may have skimped on a little quality prep time with sanding before priming. I cleaned off the dust again with a damp cloth, allowed the chairs to dry, and then I used an oil-based spray sealer-- such a great and easy way to finish the job. I simply sprayed two good coats of the sealer and left them outside to dry for a few hours. Done.

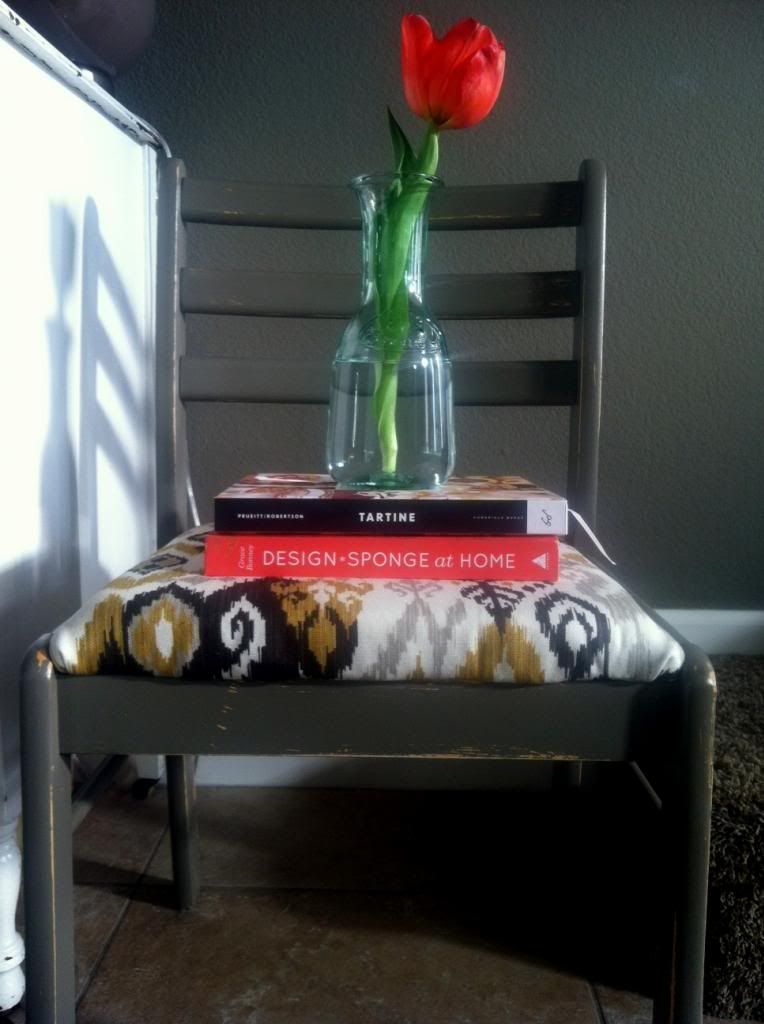
8. At this point, I was giddy with joy because my chairs were almost complete! I screwed the seats back into the chair frames and tested them out by sitting in them immediately! I love the new look and the fact that I fixed them up myself. They definitely aren't a perfect and professional reupholstered and made over set of chairs, but they are mine and I am happy with my project. The ikat print is chic and modern while the frames are little more rustic and simple-- love. love. love.

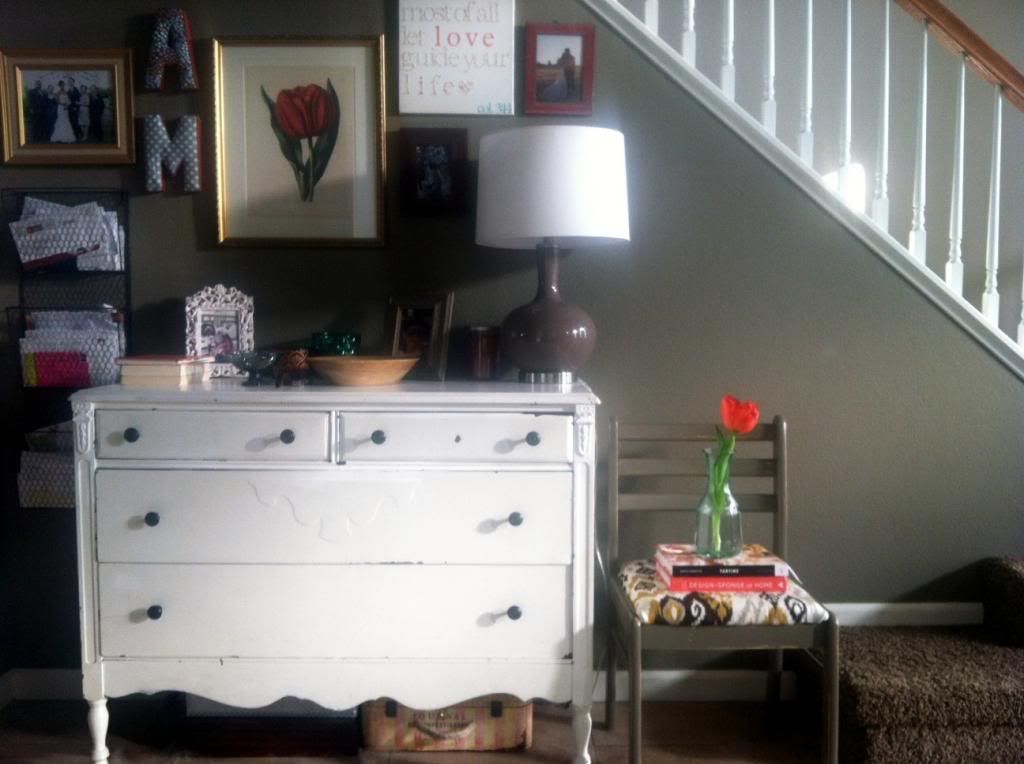
Right now they are hanging out in my house-- one in my hall next to the stairs and the other in the living room. I think they will go well in the loft that my husband and I are turning into an office area (more on that later).

Wednesday, February 20, 2013

Shedding Some Judgement Weight

Last week marked the beginning of the Lent season. For those who believe, this is a time of remembrance and fasting all to remember the rising of Christ on Easter Sunday. This is a time to reflect on life and think about something you are willing to give up, sacrifice, and fast of. The point of this is to remove something from your life that will allow you to build a closer relationship with God. I always see it as a self-cleansing sort of ritual. Of course, one shouldn't rely on Lent to take the initiative to reflect and adjust his or her lifestyle and/or habits just like New Year's shouldn't be the only time of year set aside to make new goals and aspirations. However, it's a meaningful and symbolic tradition for the Christian faith.

Growing up as a Protestant Christian, my parents never really stressed the importance of Lent. As a child and teen, I viewed it as only something Catholic-Christians participated in. However, as I learned more and grew as a young adult, I realized it didn't matter if I was a Catholic or not. The point was to make a choice to remove something in my life to, like I said before, build a closer relationship with the Lord.

Now, a few years ago, when I decided I was going to give something up for Lent, I will admit that I made "sacrifices" that were mostly for the sake of my benefit. Give something up for 40 days? Oh, that will be a great way for me to lose weight and force myself to stick with it-- no more sweets! Trying to save money? Perfect! I can totally do this with Lent-- no more shopping!  Now, there's nothing wrong with deciding to give up any of these things for the season. However, I found that my heart wasn't in the right place for it. I found myself using Lent as a crutch to help me with a problem I wanted a solution to-- all I needed was some restraint and force. As odd as it sounds, this mind-set reminds me wanting a personal trainer at the gym to kick my butt into shape. A trainer is there to force you to do something you know you should and want to do, but need a little more push and shove to achieve. And, let's be honest-- when we need someone to force us to do something, usually there's a little resentment and bitterness involved in how we view them. So, naturally, I became sad when I would have to say no to a donut or take rain checks in shopping dates with friends. Lent became all about me and what I couldn't do. With this view, I was hardly reflecting on how the fasting and sacrifice would make me a better Christian and person in general.

Instead, I now have a clearer perspective on the Lent season. Rather than it being "the aggressive personal trainer at the gym", I am seeing it as "the best friend" of opportunities. A best friend is someone who can bring out the brightest of qualities in you and are there for support when you need them. They are there to question your choices to help guide you towards happiness and the best possible outcome. The way I see it, God knows we are not perfect and accepts us that way, but would like us to strive to be better because he knows that by doing good, and through positive growth, there is the brightest light at the end of the longest tunnel. He know's what's up and it is incredible.


"Lent is a time to intentionally look at our lives, remind us that we are people on a journey, and  provide us with anticipation towards restoration." - B. Stahl


With that, this is a season of opportunity for me to really grow and rely on God instead of a particular habit, desire, or material items to remind me that I can't do it all alone and these worldly things won't help me more than He can.

This year, it was easy for me to decide on what I would be sacrificing. It is a habit I struggle with and constantly try to fix; it is something that definitely sets me back as a God-centered woman.

This Lent season, I am giving up my judgmental thoughts towards other people. Yes, I admit. I have such a hard time refraining from judgement. I struggle with this because, like so many others, it is easy to get caught up in our own lives and view our choices and behaviors as the right way. When someone else comes along that is different, it's easy to think things such as, "...they're weird, odd, dumb, crazy, uptight, insensitive, etc." These kinds of thoughts tend to put others down and uplift our own character. They are criticizing and can be degrading.  However, God doesn't judge us and loves everyone as they are. If I am trying to be more like Christ, then I most definitely need to work on this. Additionally, I know that judgement can be painful. I know what it feels like to have someone judge you as someone that you truly are not whether it's because of misinterpretation and/or a result of gossip. Having gone through a long period of  this during my early college years, I know how much it stinks to have preconceived thoughts about you that you can't control or change. So with that said, negative judgmental thoughts are getting the boot!

via

If you participate in this pre-Easter tradition, what are you giving up this Lent season?  If you don't...what is something you are trying to shed from yourself? I'd love to hear about it.


Tuesday, February 19, 2013

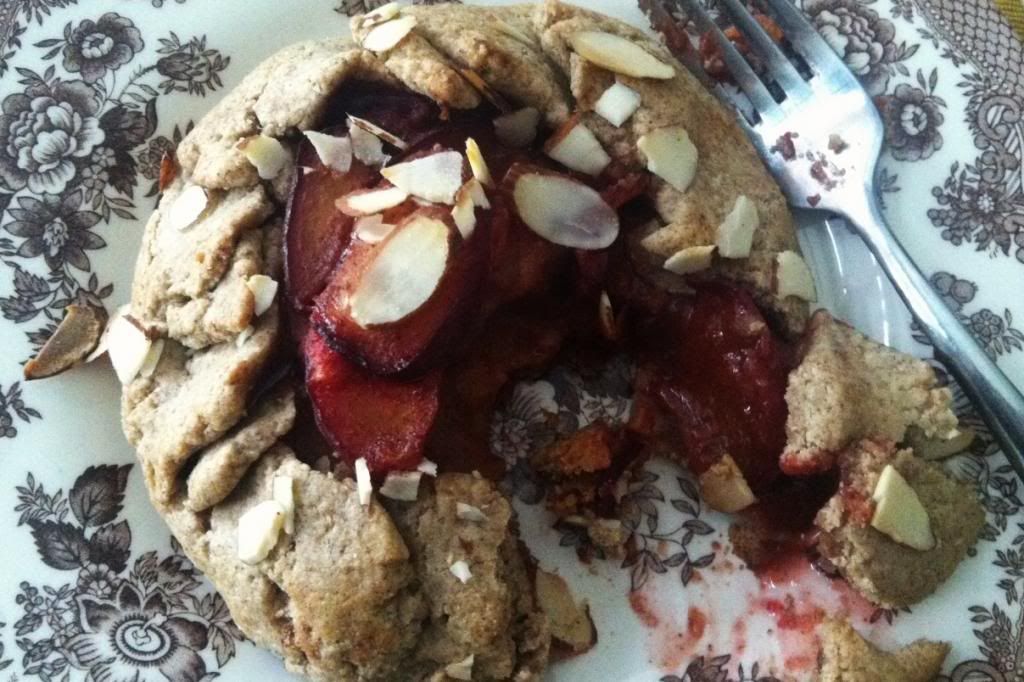
Mini Plum Crostatas


Let's be honest. Pastries for breakfast should always be a win. Whether it be in a cafe, bakery, or even your own kitchen, the smell of freshly baked buttery goodness in the morning is an absolute delight. However, leave it to my jeans to be the party pooper and remind me that too much victory over pastries in the A.M. will leave much defeat in my waistline.  

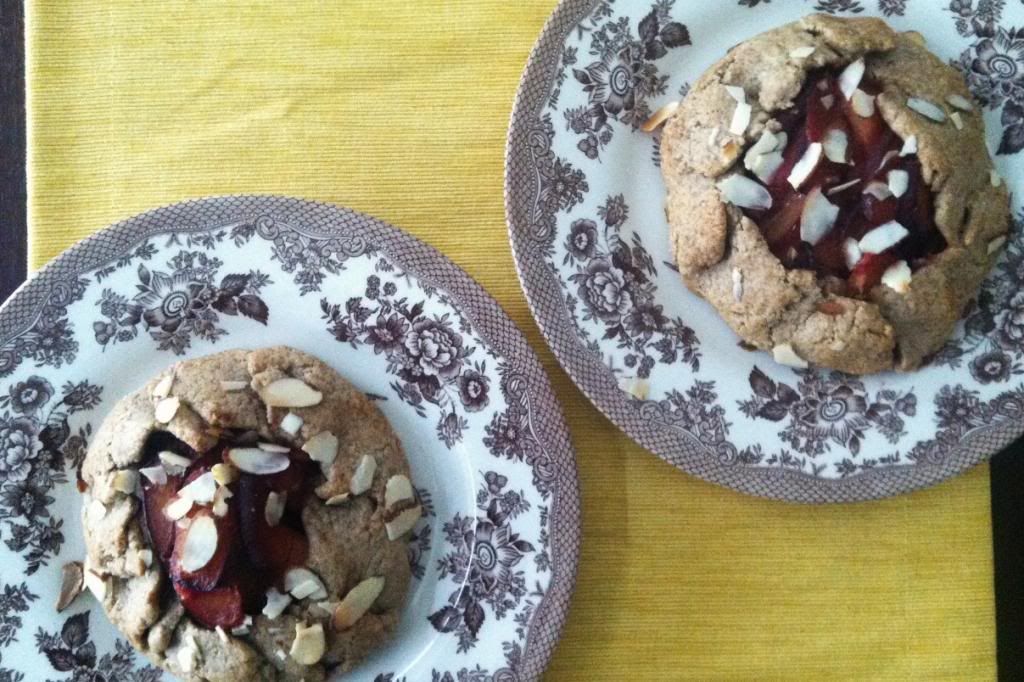
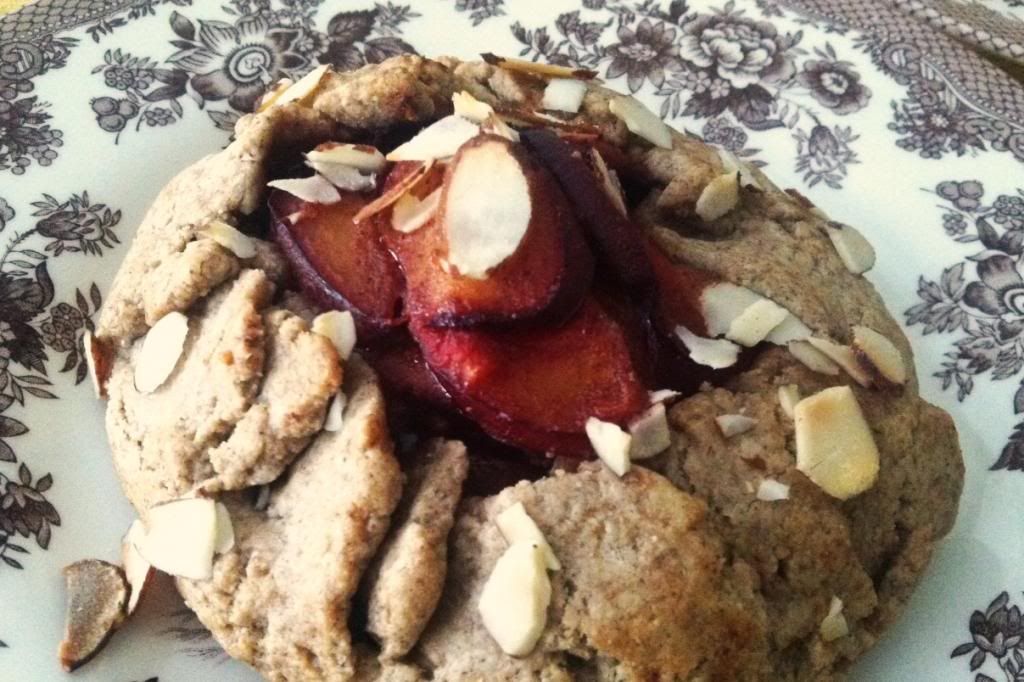
For this reason, I am always trying to come up with healthier ways to enjoy a breakfast "dessert". This morning I looked over at a bowl of vibrant plums for inspiration. Much too tart for me to enjoy fresh, I thought they might be more pleasing lightly sweetened in a flaky crust. A few ingredients and a little vanilla extract spill on my counter later, Mini Plum Crostatas were born.  I was pretty pleased with the results and loved the personalized size-- perfect for an A.M. date.  The crust is delicious with its great almond flavor and the fruit filling is tart yet sweet. The best thing is that this can be made with several other fruits. Well, maybe the best thing is that I can eat this for breakfast and dessert...and I don't have to feel absolutely guilty about it. Win. Win. Win.


Mini Plum Crostatas 
makes 2 5" crostatas

Dough
1/2 cup almond flour
1/2 cup oat flour
2 tbs raw sugar
1/2 tbsp cinnamon
1/4 tsp salt
3 tbsp cold unsalted butter, cut into pieces
2 tbs cold almond milk
1 egg + 1/2 tbsp water (for the egg wash)

Filling
1 1/4 cup thinly sliced ripe plums (feel free to substitute this with any stone fruit, apples, or berries; add the juice of 1/2 a lemon if you do-- I did not since my plums were quite tart)
2 tbsp raw sugar
1 tbsp pure maple syrup
1 tbsp ground cinnamon
1 1/2 tsp vanilla extract
*sliced almonds (for topping)

1. In a food processor, pulse together the almond flour, oat flour, raw sugar, cinnamon, and salt until they are well combined. Add the cold butter and pulse the mixture just until everything becomes crumbly and begins to look like sand. While the processor is running, slowly pour in the almond milk. The dough should form a mass and pull away from the sides of the processor. Pour the dough out onto a lightly floured surface and lightly knead it together. Divide it evenly into two portions, wrap each in plastic wrap, flatten into 3/4 inch thick discs, and chill in the fridge for 30-40 minutes. Meanwhile, prepare the filling.

2. In a small bowl, combine the plums, raw sugar, maple syrup, cinnamon, and vanilla extract.  Allow the mixture to rest while you preheat the oven to 375 degrees F.

3. When the dough is ready, remove them from the refrigerator and roll out each disc into an approximate 6 1/2 inch round on a floured surface. The dough will seem fragile and may break apart-- don't worry and just press it back together. Place the rolled dough pieces onto a baking sheet lined with parchment paper. 

4. Use a spoon to place half of the fruit mixture onto the middle of each prepared crust. Use your fingers to gently fold the sides of the crust up. It doesn't have to be pretty or perfect-- crostatas are rustic and care-free! :) If there are breaks or gaps, simply use your fingers to gently press the dough together again. 

5. Prepare the egg wash by mixing together the egg and water. Brush a small amount onto the surface of the crostata crusts. Sprinkle some sliced almonds onto each crostata and bake in the middle rack of the oven for 25 minutes or until the crust is lightly golden brown.